Thanksgiving - Pear Pie with a Gruyere Crumble topping

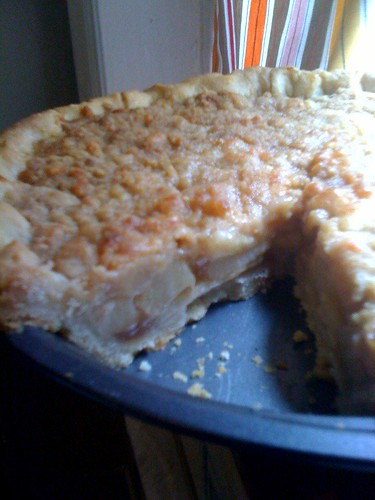
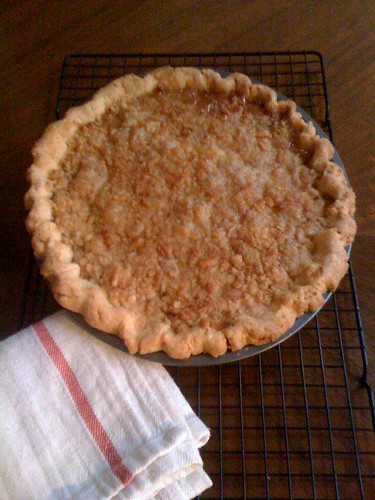
picnikfile_DZa1JN Thanksgiving for me is about comfort food and sticking with tradition, maybe throwing in a new twist here and there to keep it interesting. I didn't cook Thanksgiving this year, and in fact, except for one year, I have never been responsible for hosting the holiday. Generally, I volunteer to bring a dessert, since I feel like dessert should always be homemade on Thanksgiving. I've eaten my fair share of grocery-store bought pie, and it just doesn't cut it. I started making pumpkin pie around 17 years old, and that's always a staple. This Thanksgiving, I made a pie that I first tested last year at a pie contest in Brooklyn that I think I'll be adding to my list of traditions (for the record, I heard it came in the Top 10). It's a pretty simple recipe, with pears and a crumble top mixed with shredded Gruyere cheese, and a dash of Cayenne pepper for some unexpected heat. In my opinion, you'll always need pumpkin pie at the table, but this is a pie you'll always want at the table once you give it a try.

Pear Pie with Gruyere Crumble This recipe is more of a blueprint than a recipe. Vary the types of cheese. vary your spices, or if you want add additional fruit.

For the pie filling: 5-6 pears peeled and sliced (use whatever kind is in season for you) 1 tablespoon lemon juice 1/2 cup brown sugar 3 tablespoons cornstarch 1/2 teaspoons cinnamon 1 Unbaked pie crust

For the crumble topping: 1/2 cup all-purpose flour 1/2 cup brown sugar 2/3 cup shredded Gruyere (+ 1/4 cup for topping, optional) 4 tablespoons butter 1/8 teaspoon cayenne pepper

Preheat oven to 400 degrees Fahrenheit.

Toss sliced pears with lemon juice in a large bowl. Mix in the mixture of brown sugar, cornstarch and cinnamon in a separate bowl, then mix into the pears until evenly coated. Set aside.

Roll out the pie dough (homemade is best), into a 9 inch pie plate. Fill the pie with the pear mixture. Set in refrigerator so pie crust can hold its shape while you prep the crumble. Mix all ingredients in a small bowl, then add the butter in with your fingers, until the mixture resembles coarse crumbs.

Top the pie with the crumble topping and bake for 45 minutes, or until golden brown. If you wish, in the last 15-20 minutes of baking, sprinkle another 1/4 cup of shredded cheese on top so that it can melt. Let cool on a wire rack before serving.

Sunchokes and a twist on patate pizza

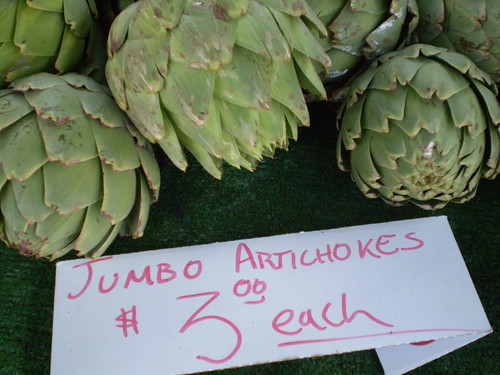
At the Union Square greenmarket late on a Saturday, I stopped at the Paffenroth Gardens stand looking for some butternut squash. Two of the women working at the farm stand table were discussing the miracle-like qualities of sunchokes, aka Jerusalem artichokes, to cure diabetes. I stood there long enough to pretend to be examining the produce left on the table to overhear claims of how eating these little knobby tubers regulated a woman's blood sugar levels. I was intrigued. Maybe I should be eating these? Why aren't I eating these? I grabbed a green net pint box and started filling it up with these unimpressive looking veggies. I quickly checked with the above mentioned sales lady, "I cook these just like a potato?", I asked. "Yep," "However you like your potatoes, you'll like these. Roast them, or mash them." I threw them in my bag and off I went feeling brave and adventurous, completely forgetting about the obligatory butternut squash. 

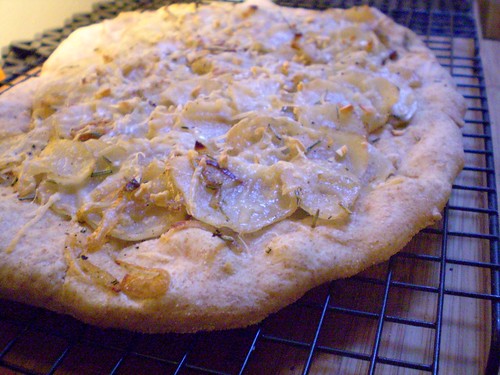
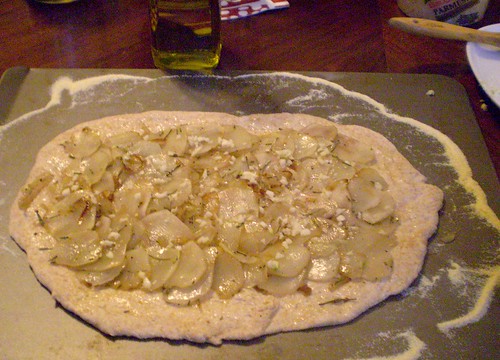
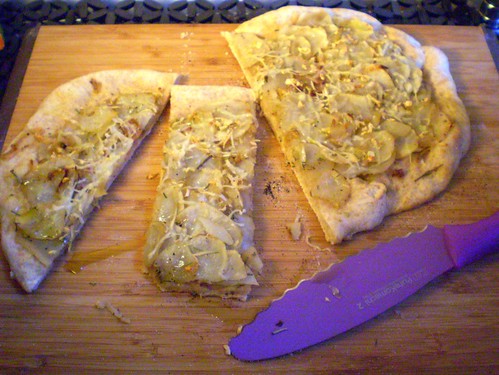
I went home and all my plans of roasted sunchokes went out the window when the memory of Jim Lahey's Patate Pizzathat you can get at the Sullivan Street Bakery suddenly came to mind. And that's all I could think about. Forget roasting and mashing, I needed to know if the supposed delicate flavor of the sunchokes could star in their own version of a pizza. Lahey's potato pizza is the stuff of my dreams. Bread and potatoes and cheese being high up there on my list of foods that make me happy. I'm a simple girl, really. If you have never been to the Sullivan Street Bakery, you need to go. If your scared of carbs, I can only suggest you stop living in the past, and start embracing the staff of life. I used the dough I already had in my refrigerator for the pizza dough. It was a whole wheat dough from Artisan Bread in 5 Minutes a Day that I keep in there to make batches of bread, but it also works in a pinch for pizza, as long as you're down with whole wheat pizza. That's where my "healthy" pizza attempts max out. I'll admit I could use a little work on the shaping of the crust. For the record, I was attempting a nice rectangle shape. At this point I was sort of winging it after consulting a few non-tomato sauce pizza recipes. I flavored the sunchokes much in the same way I would have had I roasted them - sauteing them in a pan with a little olive oil, some sliced garlic, fresh rosemary and salt and pepper. I sliced them on a mandolin first to ensure they'd be paper thin and pretty looking. For full disclosure, I should tell you that in addition to the amazing healthy properties sunchokes can have on your body, I have also read a lot about them being hard to digest, and causing some embarrasing gastro issues. I didn't notice any problems, but I did take the time to peel them first, since some sources suggested the culprit was in the skin. For a better discussion of the effects, see the very scientific and very opinionated comments on this post. If I was the type of person to have cocktail get-togethers in my fabulous loft, I would consider serving this in slices. However, I am definitely the type of person that pushes the limits on how much sugar she consumes, so I will consider eating more insulin- regulating-vegetables that can be served in the form of pizza. And, so should you.

Sunchoke Pizza Use a fresh store-bought dough, or your favorite pizza dough recipe. If you are an Artisan Bread in 5-Minutes a Day convert, use any of the recipes they suggest for Pizza dough.

1 pint of sunchokes, sliced on a mandolin (peeling is optional) 2-3 garlic cloves 3 sprigs fresh rosemary, or to taste 1-2 tablespoons olive oil 3/4 cup freshly grated Parmesan or Pecorino cheese

Scrub clean the sunchokes and slice them on a mandolin, or in even slices about 1/8 inch thin. Slice garlic cloves.

Heat olive oil in a saute pan until hot, add the sunchokes and garlic and rosemary and cook until the sunchokes taste almost completely cooked, meaning not totally mushy soft, but wilted. Keep an eye on it to not burn the garlic. Season to taste with salt and pepper.

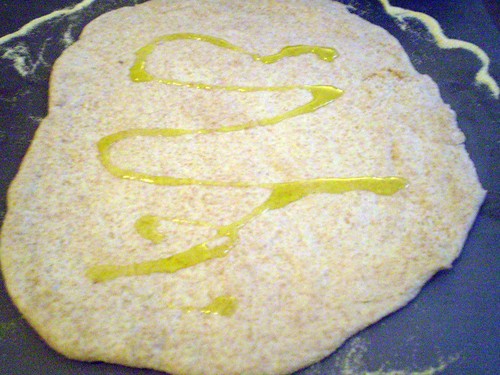
Roll out your pizza crust. Brush with olive oil. Top with sunchokes, overlapping them as you fill the pizza surface. Leave an inch around the edges for the crust. Sprinkle the top with cheese.

Let cool slightly, slice and enjoy.

Bake at 450 degrees Fahrenheit on a pizza stone for about 10 minutes or until the crust appears done and cheese is melted.

Halloween treats - peanut butter chocolate cookies

As a kid with a serious sweet tooth, spilling out candy I scored from my plastic jack-o-lantern pail, after trick or treating rank up there with some of my best childhood memories. The vision of digging through the treats I had been given, separating them into piles of good, better, and best candy (as well as wrapped and unwrapped for those of us that remember the razor blade scare) are crystal clear. For some reason, mini Reese's peanut butter cups is synonymous with those Halloween memories, always being a kind of candy that I was psyched to find, not to mention for that great vampire commercial they played around Halloween that I could never get out of my mind. I started thinking about treats to make for Halloween this year, and decided I would try to recreate a peanut butter cup in a cookie.

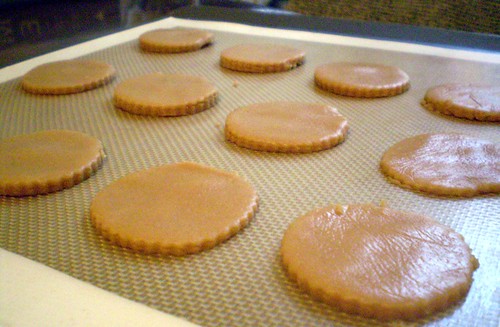
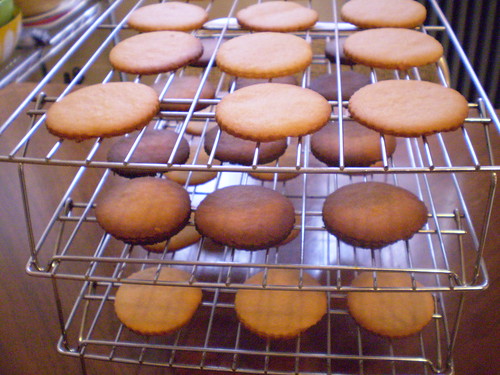
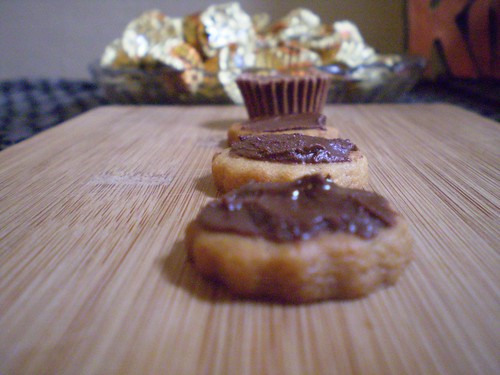
Truth be told, I don't mind peanut butter cookies, but I don't really love them either. Not the way some people do. I have made them in the past, but I really only love peanut butter when it's mixed with something else - jam, bananas, and of course chocolate. This cookie was a no brain-er. I started thinking that all candy bars, should have a cookie counterpart. The dough for this cookie, came from my best peanut butter cookie recipe, which I found in the Home Restaurant cookbook. It's basically one of the best American comfort foods cookbooks I have. These cookies were meant to be a drop cookie, meaning take spoonfuls of the dough and drop it onto the cookie sheet, like you do with chocolate chip cookies. Since I had decided to try and cut these little babies out into their candy counterpart's shape, I had to chill the dough for a bit first, in order to be able to roll it out. This dough is soft and a bit sticky. I found that 30 minutes in the fridge was not enough, but 15 minutes in the freezer after that helped. I also strongly suggest rolling it out between pieces of cling wrap, to minimize the sticky problem too (not to mention, minimizing clean up). They baked up thin and crisp. Exactly the way I wanted them. If you want them a bit denser or softer, I would just not roll them too thin before cutting. Unfortunately, their edges weren't as sharp after baking. Also, unfortunately I over baked a batch, as you can see below, while I was on twitter wishing everyone a happy Halloween. Yes, I am dressed as a big dork this year, thanks for noticing. After letting them cool, and taking a test cookie, or three, it's time to coat with chocolate. It's your call really, if you want to dip them and completely coat them with the chocolate, or just smear the top with it. Either way, they have to go into the refrigerator afterwards to help the chocolate dry a bit. The mini-sized cookies were my favorite, completely addictive as one-bite cookies. The situation quickly became a throw-back to those days when as a kid you'd lose count of all those miniature candies you'd eaten. They just go so fast. Good thing there's no one here to tell me to slow down before I get a stomach ache.

Peanut butter chocolate cookies Adapted from the Home Restaurant Cookbook.

1 1/2 cups all-purpose flour 1/2 teaspoon baking powder 1/2 teaspoon sea salt 1 stick (8 tablespoons) of unsalted butter 1/2 cup sugar 1/2 brown sugar 1/2 cup smooth peanut butter 1 egg 1 tablespoon vanilla 1 1lb. semisweet chocolate, melted

Preheat the oven to 375 degrees Fahrenheit.

Mix the flour, baking powder and salt in a small bowl. Set aside.

With an electric mixer, cream butter with the two sugars, and the peanut butter for 3 minutes. Add the egg and the vanilla, beating for another minute.

Slowly add the flour mixture on low speed, and beat until all is incorporated. If dough seems to be clumping. Mix the rest by hand till all the flour is incorporated. Flatten dough into a disk and wrap with plastic wrap and chill for 1 hour, or 30 minutes plus another 30 minutes in the freezer.

Roll out dough between two sheets of plastic wrap until 1/4 of an inch thick. Cut out shapes and bake for about 9-11 minutes, or until golden brown around edges.

Cool cookies on a rack, and once they are ready dip or spear top with melted chocolate.

What I do with apples besides baking with them...Waldorf Salad

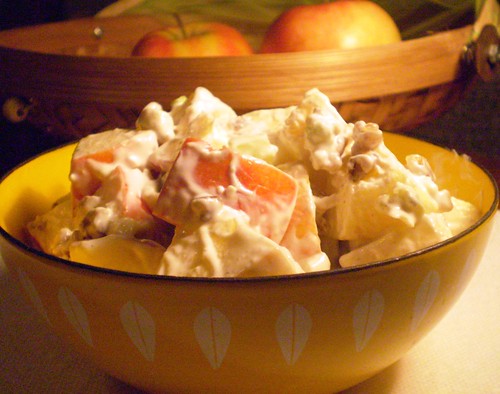
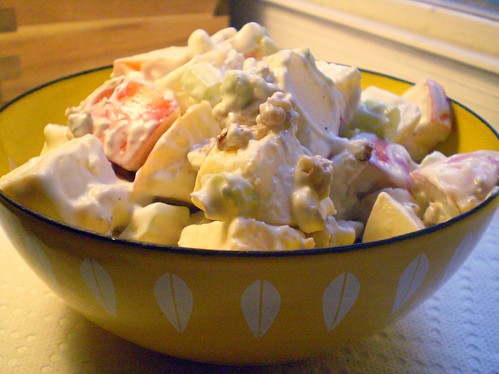
waldorf saladI recently took a ride about an hour and half north of NYC, through bright fall foliage, to Warwick to go apple picking with my family. Masker Orchards, is a pick your own orchard is a huge orchard that's very kid friendly (think petting farm, pony rides and very short trees). Too bad the only kid with us, was sleeping. That didn't stop me from filling up my bag with Jonagolds, Ida Reds, McIntosh, and various others. As I picked, I had visions of apple strudels and apple tarte tatins in my head. I even thought about trying to make apple butter when I got back to Brooklyn. But instead, after too much obsessing over the end of Mad Men, and how to dress as Joan for Halloween, an old retro-classic popped into my head, Waldorf Salad.

I have always been intrigued by the name of this salad, but I do not recall ever eating it. It was the kind of thing I saw in the yellowing pages of my grandmother's cookbooks, and frankly something I thought was the epitome of dated cuisine. Still, to me (and my overactive imagination) the name alone, evoked images of days long gone and ladies who lunched (I hear those ladies still exist somewhere) and lettuce leaves filled with salads with fussy names served on fine china.

But, to my surprise, I found a little version from the classic vegetarian cookbook, The Moosewood Cookbook, by Mollie Katzen that made me think this simple salad with the fancy name might actually be tastier than I had assumed. I consulted my trusty Fanny Farmer, just to see if a more original version of the recipe differed much. It didn't, with the exception of blue cheese. My thought process went something like this, "Blue cheese? Apples? Sold!"

This salad is a breeze to put together once you chop up the few ingredients, mix the dressing and then toss together. Cooking 101, except these flavors mixed together are nothing to brush off as simplistic, or dated. I want to bring it back. Give it a try, serve it for lunch, serve it as a snack, or part of an appetizer spread, just don't serve it in a lettuce cup, and I think you'll see that this salad should come back into fashion. apples + blue cheese salad

Waldorf Salad Adapted from The Moosewood Cookbook.

3 apples, tart ones are best 2 stalks celery, chopped 2 green onions or scallions, chopped 1/2 cup walnuts, toasted and chopped juice of one lemon 1/2 cup plain yogurt (I used Greek yogurt) 1/2 cup mayonnaise 1/3 cup crumbled blue cheese (I used Gorgonzola) 1 tablespoon honey (optional)

Chop apples, celery and scallions. Toast the walnuts. Mix together.

Crumble the blue cheese, or break it up using the back of your fork. Mix with yogurt, mayonnaise, and honey.

Toss salad ingredients with dressing. Feel free to add more apples or even pears if the dressing to salad ratio is too heavy.

Pissaladière-inspired tomato tart

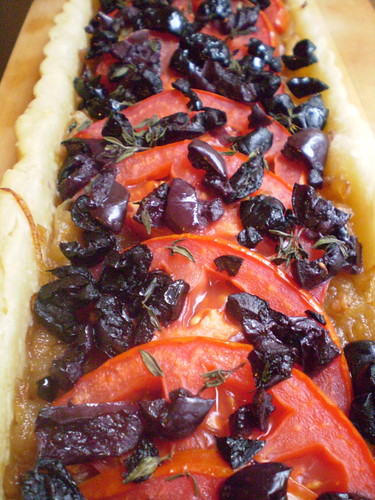
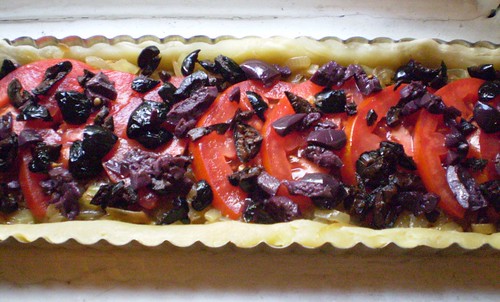
P9190430.JPGSummer is officially over, but a few juicy red tomatoes who don't want the party to end can still be found hanging about the greenmarket. This is the perfect time to bake something with them now that temperatures have cooled off a bit. That's why my recent attempt at making a pissaladière one Sunday afternoon started looking more like a tomato tart. They were simply stealing the show. Just because the calendar says the season has officially changed, does not mean that everything on our plates has to instantly turn over as well. I actually hate when people rush the seasons. Christmas decorations in the drugstore for sale right after Halloween are just as silly to me as being served pumpkin soup on a balmy 84 degree day in September. That's why I suggest you ease into the season, even if you're as excited for Fall as I am. Make sure you search the market for any last summer produce, cause you should use what's left of it while you still can. Last weekend, in an effort to think of a fun football watching snack, I decided I was going to try to make a pissaladière, which is a type of "pizza" from the South of France (actually I think that without cheese or tomatoes calling it a pizza is a stretch). Pissaladière sometimes is made into a tart shell  and I had prepped the shell about a month ago for such a purpose and left it in my freezer. I took the shell out of the freezer and blind-baked it while I prepared the filling. The recipe I was following was from the Rose Bakery cookbook that had a modern take on the dish. However, just to compare, I pulled out a Cook's Illustrated magazine a friend had given me with a recipe for pissaladière, done the more traditional way, on a pizza-type of dough, free-formed and with anchovies, not tomatoes. I was really tempted to go traditional, but I figured I had all winter to make one that way. I found gorgeous tomatoes at the market on Saturday, and ate a good portion of them with nothing more than a sprinkle of sea salt, while the juices dripped down my hand. The rest were destined for this dish.

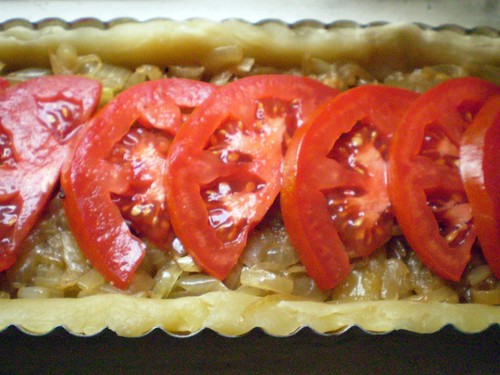
The filling is pretty simple to assemble once you cook the onions down until they are caramelized and jammy. That takes about 30 minutes, meanwhile pitt and chop some olives and slice your tomatoes. I actually took some hints from the Cook's Illustrated on cooking the onions, figuring someone probably got paid to figure out the nuances of the best method of cooking them down, and I loved the addition of brown sugar. After all was said and done, and the tart was filled and baked, it was an exciting flavor combination with the sweet onions, the briny olives and the bright flavors of the tomatoes. It was a beautiful presentation too, perfect for a side dish at a Sunday dinner perhaps, or an ideal lunch. For football, maybe I should have gone with the pizza-dough method, rather than the tart, because football food should be finger-food, even if it is French inspired. picnikfile_nVR_iH

Pissaladière Tomato Tart Adapted from Rose Bakery and Cook's Illustrated. If you don't feel like making a shortcrust tart dough, try the filling on a pizza dough stretched into a long rectangle and adjust baking times.

1 blind baked tart shell (use any shortcrust pastry dough you prefer) 3 tablespoons olive oil 2 lbs. yellow onions, sliced about 1/4 inch thick 1 garlic clove smashed (not chopped or it will burn) 1/2 teaspoon of salt 1 teaspoon brown sugar pinch of ground cinnamon (optional, but adds something interesting) 1 tablespoon water 1 handful olives, pitted and chopped (black olives are traditional, but I used a mixture) 2 tomatoes, sliced few sprigs of fresh thyme

Prepare tart shell, if using by blind baking while you prepare filling.

Slice the onions, and heat olive oil in a large saute pan until hot, but not smoking. Add onions, garlic, salt, brown sugar and cook on med-high heat for about 10 minutes, stirring often. They will look wilted at that point and be starting to brown. Reduce heat to low and cook, until onions are jammy and golden brown, about 20 minutes longer. Take off heat and add the cinnamon and water and stir til incorporated.

While onions are cooking chop and pitt olives, slice tomatoes, and pull prep thyme. (Stretch the pizza dough on a sheet pan, if you're using that instead of tart shell.)

Fill tart shell or cover pizza dough with onions once they're cooked. Lay the tomato slices in on top and sprinkle the whole thing with the thyme leaves and the chopped olives.

Bake the tart at 350 degrees Fahrenheit for about 20 minutes, or until tomatoes look wilted a bit. If using pizza dough, bake until crust is cooked.

Pork and oyster sauce noodles with a side of confession

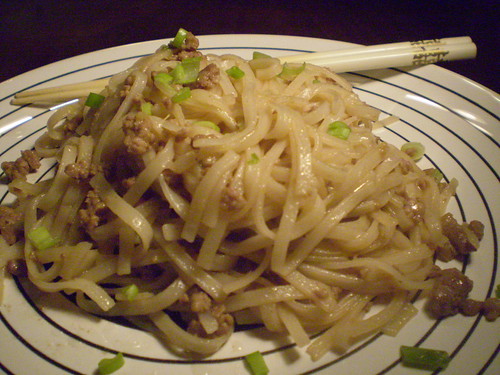
 P9190435.JPGWeeknight dinners. They're the stuff of countless women's magazine articles, on how to make them faster, cheaper, healthier and hopefully exciting without reaching for a frozen box of processed something. I've tended to handle this problem in one of two ways - the ordering in approach (after all I deserve it - I worked all day), or the slow graze on anything and everything in the kitchen. The latter has been the more popular method recently thanks to my household deficit. So, that means, frankly, that behind the scenes of this blog, I eat a lot of cheese on crackers, or eggs in a basket for dinner. This elaborate feast is often followed by a second course of hummus, or cereal, or frozen dumplings, depending on my mood. That's the truth, and I'm ok with it because at least nothing is processed crap. It works for me, until I get bored and re-inspired that I can do better. I recently found a new option, one that I think you'll love as much as I have. It's a dish that with a bit of advance shopping on the weekend, will have you reaching for that take-out Chinese, or Thai menu a little less in the future.

This discovery was the result of my search to find more Asian-inspired quick dinners, which is just the phase I'm in. Last year all I wanted was Italian. I also realized that my collection of rice noodles, udon noodles, soba noodles, bean threads and various other ingredients I buy on my trips home to Queens were taking over my kitchen cabinet and I had no real plans for them. Don't even ask about my failed attempt to make summer rolls. Last week, on my lunch break I found myself browsing the cookbook section of the New York Public Library, where I found Ken Hom's Quick Wok cookbook. It looked like it could be the solution to my problems. After all, I had almost all the ingredients in my pantry for all the noodle and rice dishes. P8040372.JPG

 The first night I brought this book home dinner plans were another grazing night through the fridge, but I was so anxious to try one of Mr. Hom's recipes that I immediately set out to make this dish, despite the fact that I was missing the star ingredient, ground pork. I prepped the rice noodles (see photo above, the Pad Thai kind) and the ginger and the stir-fry sauce, which is mostly oyster sauce and a little stock. It all came together quicker than I could imagine. As, I was tossing the noodles in the pan and flinging oyster sauce all over my shirt, I realized they looked a little sad. Desperately, I looked for something in the freezer to add to this. Potential options included, frozen sausage, a lone chicken thigh(what was my plan for that?), breakfast sausage, frozen peas, when I spotted a bag of Ikea meatballs that D had bought. Could this work? In a move that was one part genius and one part pathetic, I took a bunch and chopped them up. My brain was mildly disgusted, but my stomach was winning the debate. I quickly added them to the noodles, and told myself it was ingenuity at it's best, and I should send the idea to Ikea Hacker. Now, that you all know how grimy things can get in my kitchen, let me redeem myself and say, after I ate it, I knew the noodles were great and I also knew that I'd have to do better, a lot, lot, better, before I shared this.

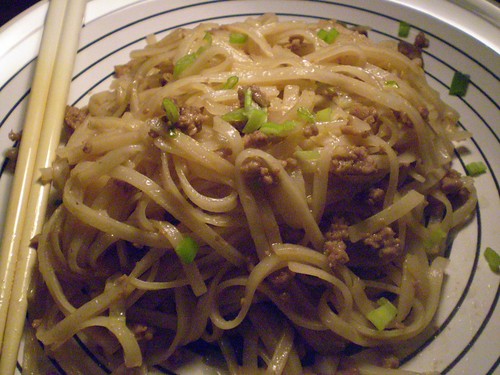
This past weekend, off I went to a place where one can find reputable meat, as opposed to cheap bookcases in my neighborhood, The Meat Hook, where I bought enough ground pork (freshly ground when I ordered it) for two weeknight meals of this dish. The flavor of  oyster sauce is pretty pungent so I feel like these noodles would work with ground chicken, or beef or maybe even crumbled tofu, depending on what your eating preferences are. One pound of the meat went in the freezer so that I could avoid being tempted to improvise that much ever again. The other pound got made into the kind of noodle dish I could eat week after week for dinner, and if D hadn't finished all the leftovers, I'd be happy to take it for lunch the next day too.   picnikfile_kLo8dA

 Pork and Oyster Sauce Noodles
Adapted (very little) from Ken Hom's Quick Wok.
 
8 oz. dried rice noodles
2 teaspoons sesame oil
1 tablespoon light-soy sauce
1 tablespoon oil (canola, peanut, vegetable)
1 pound ground pork
5 tablespoons oyster sauce
3 tablespoons chicken stock
1 teaspoon sugar
1 tablespoon finely chopped ginger
6 tablespoons chopped scallions
 
Prepare noodles by soaking them in a bowl of very hot/boiling water from about 15-20 minutes or until soft. Drain and rinse with cold water. Toss with sesame oil and soy sauce and set aside.
 
While noodles are soaking, gather all your other ingredients and chop ginger and scallions. It all comes together quick, so be ready. Heat a wok over high heat. Add the oil and meat and stir-fry 2 minutes. Drain off a little of the grease from the meat. Add the oyster sauce, stock and the sugar and continue cooking another 3 minutes, until meat looks mostly cooked through. Add the noodles, ginger, and scallions and stir-fry until everything looks incorporated and meat is cooked through, about 2-3 minutes more.
 
Serves 4 normal people, or 2 people with a warped sense of normal serving sizes.

Carrot to the cake and my first guest post

I know some people who know some people who write a slamming blog filled with cultural news, cartoons, political discussion, the goings on around Miami, and so much more. I recently contributed a food post, for the best carrot cake recipe I've ever tried. Head over to The Heat Lightning to check out the recipe, hysterical news on The Jersey Shore in Miami, and how I really feel about cupcakes.

A visit to the North Fork

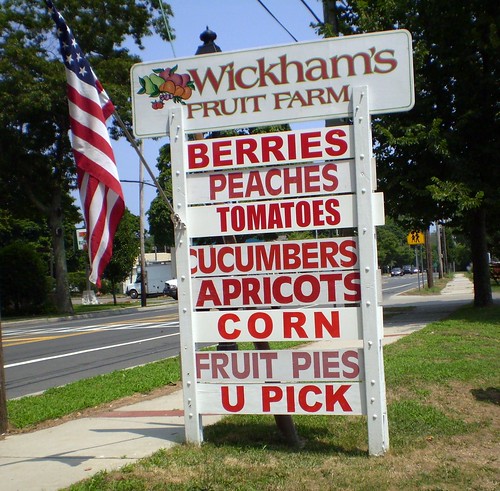
Wickham's Farm Getting up to be anywhere by 8 am is not really my thing. I'd like to think one day I will morph into an early bird type and be able to enjoy the city before it gets busy and frantic, all the while getting a jump start on the day's tasks. It hasn't happened yet. Actually there is one exception to this problem. Travel. The promise of a trip, almost anywhere, will have me ready to go at least ten minutes early (even if it's without the bright-eyed part). So, when I received an invite to accompany Fresh Direct on a tour of some of the farms they have been working with on the North Fork, of Long Island I knew I'd be jumping out of bed early at least one day that week. The promise of tasting some of this great local food firsthand, and learning about ways to eat locally and still shop at a commercial grocer, just sweetened the deal.

First stop, Wickham's Fruit Farm, which is the oldest continuing operating farm on the North Fork. How old? Well, the farm is over 300 years old, and Tom Wickham, who gave us the tour is the 13th generation to be farming this mere 300 hundred acre plot of land. I suppose 300 acres wasn't much if your family was house shopping pre-American Revolution?! The Wickham's original house was build in 1649 (it's preserved and we drove past it - yay for adult class trips!), and still sits on the property. Tom told us that 200 acres of the land is actually farmed. Originally the land was used for potato farming, but today it is a plethora of fruit orchards and an impressive greenhouse that grows the sweetest tomatoes. I tried plenty of the cherry tomatoes that fell to the greenhouse floor just to be able to tell you that. These are the same tomatoes that Fresh Direct carries. The greenhouse ground is steam sterilized which prevents them from using harsher chemicals and all the the greenhouse tomatoes are unsprayed as well. (Though they can not get the organic label because they do use fertilizer).
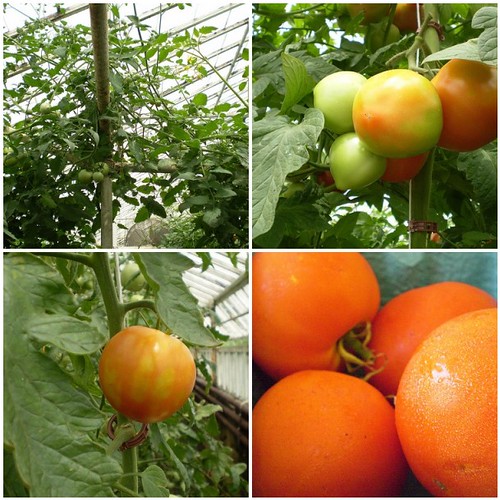
Greenhouse tomatoes

Tom, who is a wealth of information, gave us a lot of his personal opinions on everything from immigration policy, to the plight of disappearing honey bees, as well as his views on the organic versus non-organic debate. According to Tom, organic fruit production on Long Island is virtually impossible because of the humidity. He showed us his license issued by the NYS Department of Environmental Conservation, a government agency that closely regulates the spraying of crops. NYS strictly regulates the use of restricted pesticides, in part because they are protecting the acquifer that supplies Long Island's well water. Tom, pointed out that locally grown fruit is safer to eat thanks to these regulations, as opposed to fruit grown overseas that is not regulated at all. I was so impressed with Tom and his family (his niece is running a hydrangea farm, his sister-in-law was picking blueberries, and his wife was waiting for a school bus of kids from Harlem to take them on a tour of the farm) that I would recommend anyone driving out to the North Fork make a stop at Wickham's. The fruit stand is open everyday but Sunday. I am definitely going back out in the fall for apples and pumpkins. Another great tip from Tom, who at 71 gets noticeably excited to talk about varieties of apples, McIntosh apples are a thing of the past, and Mutsus and Crispins are the best cooking apple.
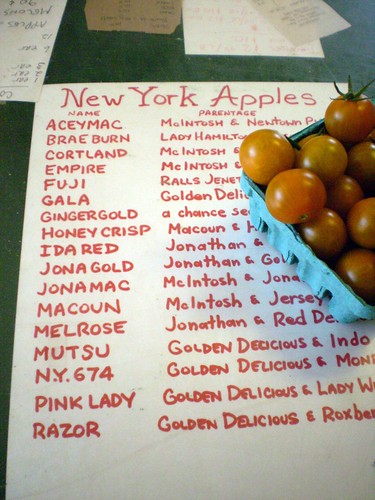
NY - the big apple(s)

Satur Farms was our second stop and we walked into the modern farm world as envisioned by two perfectionists, Eberhard Müller and his wife Paulette Satur. When I heard that Eberhard would be cooking our lunch later that day from produce picked on the farm, I was excited. But, when I heard that Eberhard had been a chef before he started the farm in 1997, and not just any chef, but the former chef of Lutece in New York City (he also helped open Le Bernardin with Gilbert LeCoze according to his bio), that's when I became positively ecstatic. Truth be-told, I sent a text message that read, "I feel like the luckiest girl in the world today." I will tell you all about the lunch below, but without the farm there would be no lunch, so a little bit about why I was blown away by this modern farm.

Satur Farms

Paulette and Eberhard started small when they opened. Their first customers were the high-end restaurants that Eberhard and his friends worked at. They would drive out to the farm late on a Friday night, work all day Saturday, driving back to the city on Sunday with whatever they picked that weekend, making drop offs at the few restaurants that heard about the amazing greens they were growing. It's the chef equivalent of your neighbor bringing you some extra bounty from their backyard garden. Eberhard was originally from Germany and he wanted to model some of the better European ways of growing. One of the practices that Paulette explained that most impressed me, is so basic and ecologically sound that I can not believe most American farmers do not do the same. The seedling that Paulette is holding up in the photo above, is not planted in a disposable plastic container, but is planted into a little press pot of soil made by a machine. This allows them to do all their transplanting without any waste.

Satur Farms has been working with Fresh Direct for six years now. Paulette explained that Fresh Direct is their farm stand in a sense. They couldn't just bring many of their delicate leafy greens to sit in the sun in a parking lot at a greenmarket and have them be as crisp and fresh as they want you to enjoy them. Working with Fresh Direct they pick the greens, wash them, vacuum cool them, and then package them on the farm in Long Island and then Fresh Direct is shipping them to you the next day. They have expanded their operation to a year around business buy growing the greens in Florida during the winter months. Paulette explained that the greens that they grow in Florida make their way to Long Island to be processed within 24 hours, which in her opinion is still preferable in terms of freshness and environmental concerns for us in New York. Produce grown in California would take closer to six to eight days to get to your table. Each day decreasing in flavor.
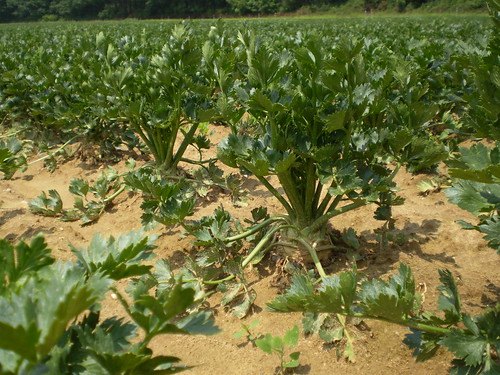
P7160330.JPG

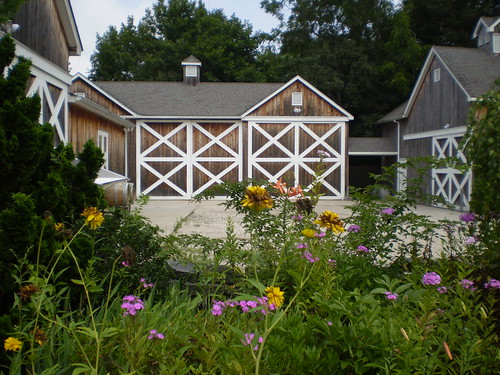
The array of vegetables that Satur Farms grows was impressive. They have mesclun, arugula (or rocket), butter head lettuce, of course. They also grow all types of herbs, leeks with long white shanks (Fresh Direct carries both of these too), chard, beets, baby carrots, baby spinach, frisee, and celery (see the photo above for what a celery bulb looks like as its growing). They started growing mache, a very popular green in Europe, and have at times taken other suggestions from chefs.  They are not a certified organic farm, but do use organic sprays and only steam sterilized manure. Another wonderful aspect of farming on the North Fork, is that they are irrigating the fields with well water. Paulette explained that when we've had large recalls of spinach and other vegetables from California, it is because the water they have to use is above ground and susceptible to water born bacteria. By the end of the farm tour, I already knew I'd want to support any farm dedicated to perfection and good environmental choices. Then we went to lunch at beautiful Paumanok Vineyards, pictured below, and I had a meal that was a lesson in what it means to eat seasonal, fresh food.
P7160331.JPG

I should mention, in case you weren't aware, that when most people visit the North Fork they are going for the vineyards. There's a little map you can pick up that lists each vineyard you can visit for wine tasting. I highly recommend more people take this trip. It's a ton of fun (I've done it twice by now, hoping to go again this summer) and I really do find that the white wines are really very good. I haven't loved the reds as much, but then again, I haven't tried them all. The Paumanok family, were all in attendance at this lunch and they were pouring Rieslings (a dry and a semi-dry), a Dry Rosé, a Chenin Blanc (I believe they are the only vineyard on the North Fork growing this grape), among others. It was a perfect setting for the lunch prepared by Eberhard. The ingredients were literally picked that morning, on our plate by lunch, fresh food. According to the Chef, when your food is that fresh there isn't much you need to do to it to bring out the delicious flavors. Eberhard said, "food can't taste any fresher than it does here," and after this lunch, I would have to agree with him. If I win the lotto, I'd by a house on the North Fork over the Hamptons any day.

Eberhard Müller

Seasonal Lunch courtesy of Satur Farms

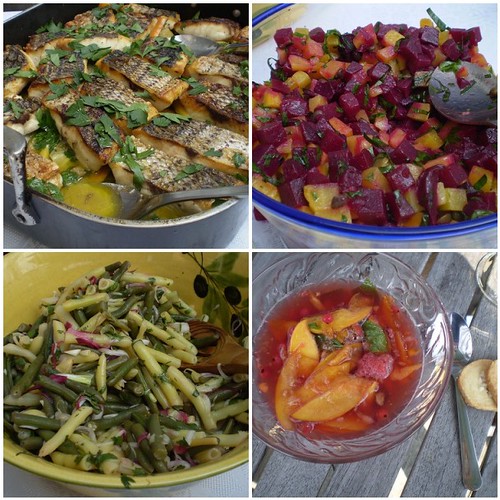
These photos are some of the more colorful dishes that we enjoyed.  That is a striped bass escabeche, with baby carrots, a beet salad, a green bean salad, and a peach and nectarine fruit soup with a lemon verbena syrup and red currants. This lunch will forever make my lunch of hummus and crackers and maybe a cheese sandwich seem very sad. The color's were breathtaking. It was just as visually beautiful as it was a flavor explosion. Everything was just simply dressed letting the true flavors of the produce shine. I will try to recreate the beet salad for you in the coming days.

To sum up this day trip courtesy of Fresh Direct, I now fully appreciate how this innovative company has taken a big leap towards doing the right thing for the future, and believing that their customers are smart enough to take notice and support their efforts. Now, lucky New Yorkers never have a reason to gripe about not making it out to the greenmarket after work, or living so far away from amazing farms.

FreshDirect has provided a discount code as a special deal for all my NY readers. Enter the SUPPORTLOCAL code for 20% off your entire Local Market and is good all summer long.

* Limited time offer. Expires August 31, 2010. May not be combined with any other offer. All standard terms and conditions apply. Limit one use per customer/account. Residential orders only. Void where prohibited. Offer is non-transferable.


Bing Cherry Baklava

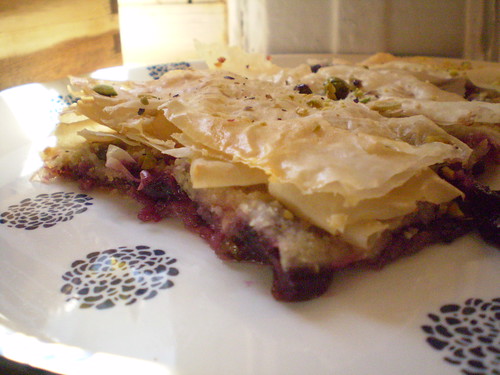
P7030261.JPGI'm not sure what to say about cherries. If you're not eating them, you're missing some of the best fruit nature gives us. I eat cherries by the pound as soon as they show up in summer, until they're practically past their prime and rotting in the box on the way home at the end of the season. I've never thought to do anything with them other than snack on them. Although I love cherry pie, cherry strudel, even cherry soup (yes, there is cherry soup) cherries in my kitchen do not last long. This time I wanted to try something new, and last week wanted something festive for the 4th of July. Somehow I suddenly wanted to try making a cherry baklava, even if it's not as quintessentially American as I had in mind, I told myself it could be a great melting pot tribute to the U.S.A. After all, I'd like to think ingenuity is a quality all patriotic people embrace.

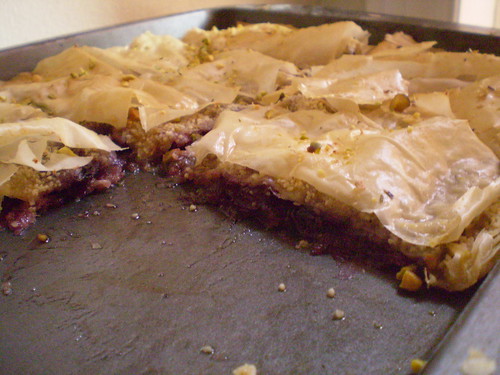
I should say that I realize that my use of the word "baklava" is only loosely appropriate here. I have never been to any of the countries where baklava is a mainstay (Greece, Turkey, parts of the Middle East) so maybe things are different there, but in New York City, I have never seen a variation on the classic baklava. So, I hope I don't offend any die-hard baklava fans with this adaptation. That said, I feel that the use of layers of phyllo dough, chopped nuts and honey syrup are enough to allow me to consider this dessert a baklava of sorts. It is filled with pitted and chopped cherries and a bit of sugar (they're so sweet they hardly need much help). It adds a nice flavor to the dish, as so many baklavas are completely overpowered by the honey syrup poured over the top. If you want a stellar recipe for the classic kind, check out this amazing version. As this was my first baklava attempt, I decreased the amount of layers of phyllo between each layer thinking it wouldn't matter and be less about the crust. That was a mistake. As you can see in the photos, it's  a bit too flat. I have adjusted the recipe so that when you try it it will be better thickness. P7020249.JPG Before you worry that you can't make this dessert because you don't have a cherry pitter, neither do I. Since I was chopping the cherries in half, I simply used a small pairing knife and my fingers. It took about ten minutes to pit about a pound of cherries working quickly. Not the end of the world. Alternatively, here's a great rundown on all the different ways to pit a cherry, including using a safety pin. Like I said, perfectly whole cherries are not needed for this recipe though, because phyllo is too delicate to be able to layer around them without a mess. Everything is chopped which adds to the great texture that this dessert has. Its a mix of crunchy chopped pistachio nuts, the soft syrup soaked bottom layer of the phyllo, and the light as air crisp top layer. It's all those things with an added layer of cherry pie filling mixed with ground almonds. Another American virtue, like it or not is excess, and this is definitely an excess of dessert goodness.

Bing Cherry Baklava Adapted from The Olive and the Caper, by Susanna Hoffman. Makes one 9"x13" pan. Can be prepared ahead of time and left out till serving.

1 package of phyllo dough (about 32 sheets), defrosted 1 cup of unsalted butter, melted 1 cup of ground almonds or finely chopped 1 teaspoon of vanilla 1 cup of finely chopped pistachios 1 1/2 bing cherries, pitted and chopped 1/4 cup of sugar 1 Tablespoon cornstarch 1/2 cup of honey heated and mixed with 1/2 cup of water

Preheat the oven to 350 degrees Fahrenheit. Prep ingredients before layering.

Take phyllo dough and lay flat with a sheet of wax paper on top with a damp kitchen towel over that to keep sheets moist. Melt butter. Pit and chop cherries, mix with sugar and cornstarch, and set aside. Mix ground almonds and vanilla. Set aside. Chop pistachios and start to layer the baklava. (Either cut phyllo to fit pan before assembling or you can cheat and do it at the end like me).

Start with 7-8 layers of phyllo at the bottom of a 13"x9" inch pan. Brush melted butter over each layer before laying on the next. Butter the last layer, then spread a third of the almond mix evenly over the pan. Follow that with chopped pistachios. Take cherries and spread them evenly over the almond layer. It will look messy, but don't worry. Place another 8 layers over that, continuing with butter in between each layer. Layer another third of almond mixture and then pistachios. Repeat layers once more, and end with the last 8 phyllo sheets. Brush with butter well.

Using a sharp knife, cut through all the layers hanging over the pan, if you still need to and then cut 15-18 diamond or square shapes. Place in the oven for 20 minutes.

After 20 minutes, take out of the oven and pour any remaining butter over the top and continue to bake for another 20-25 minues until golden and crisp. Remove from the oven and let stand for 5 minutes to cool slightly.

To finish, take the honey syrup and pour around the edges of the dish and in between the cuts. Avoid spilling on top to prevent it from being soggy. Set aside and let cool completely. Sprinkle top with chopped pistachios. Feeds many hungry people or a few greedy ones.

How'd you get so smart?

I'm so relieved that I can finally tell you about ThinkFood. It's been hard, waiting for the launch, but today's the day, and now you can know that I've had the honor to be a part of an unique new cookbook. ThinkFood, is a collection of recipes from food bloggers around the world with a common theme. All the recipes feature an ingredient that is considered brain food, or in other words, food that has been shown to have a scientific positive improvement on your brainiac ability. Maybe it'll even help you get better at Sudoku.

This cookbook is the brainchild (sorry) of a company called Posit Science. I didn't know about them before I heard about the project, but since then I've discovered their products, and in my opinion they're onto a great idea. Everyone could benefit from paying a little more attention to their brain health. I mean after all those years in college (and after) of abusing your brain cells (not me of course) it's probably a smart idea to do something that can have a positive effect on your brain now. The cookbook illustrates a tasty way to approach these concerns just by eating. The cookbook covers salads and appetizers, main courses, snacks, and of course desserts. Can you guess which category I picked?

Posit Science will distribute one recipe from the ThinkFood cookbook every Wednesday for the next 50 weeks to all who subscribe. This includes the print version of the recipe for free, more about the brain healthy ingredient in each recipe, and the blogger who contributed the recipe. The actual hard copy of the cookbook will be available for purchase in July. I've seen the list of bloggers who have participated, and I can promise you, this will be the best tasting "health" food you'll ever have.

Join ThinkFood's recipe of the week campaign, sign up here. (It's free).

Of course, my contribution to the cookbook was in the Dessert category, but you'll have to wait until it's my week to hear more...to be continued.

Learn more about Posit Science and their company here.

Everyone wins with strawberry cheesecake bites

I did it. I won my first contest. I don't mean to brag or anything, but winning really is sweet. Last Wednesday, I participated in the Best Desserts benefit for The Lamp organization. In the spirit of charity, myself and five other fabulous bloggers turned out an impressive array of desserts for the competition. Esther, took home the audience favorite win with her Jacques Torres inspired chocolate chip cookies, Katy brought mocha brownies, Anna brought amazing bite-sized salted turtle cashew cupcakes, Rachel gave us Asian rice crispy treats and Emily brought chocolate chip cookies covered in a salted butterscotch sauce, yum!

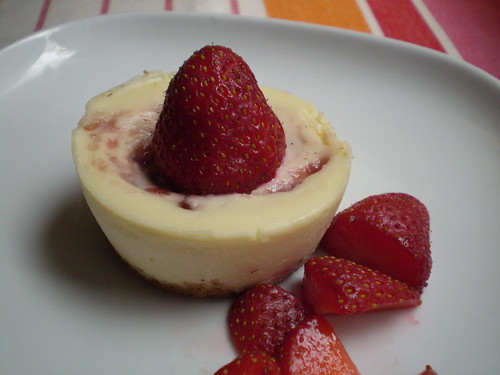
I decided to make strawberry cheesecake bites after being inspired to do something with the incredibly sweet and juicy local strawberries I found at the Greenmarket last week. They blew my mind, nothing like those super-sized ones in the supermarket. These little berries have super-sized flavor and paired with a killer cheesecake, well, it's my idea of a best dessert.

When I set out to come up with my own version of cheesecake, I went to the source of great cheesecake. It's Junior's cheesecake that originated at Junior's Restaurant in downtown Brooklyn. I still remember driving past the restaurant for the first time with Bernie (my grandfather), as he pointed it out to tell me they had great cheesecake. I knew I could trust his opinion on the matter because the only thing Bernie ever points out while driving is all the storefronts that used to be a Jewish delicatessen, well, that and whoever is committing a driving violation. The man really missed his calling as a traffic cop. Back to cheesecake, I'm from New York, and I believe that great cheesecake is New York style cheesecake, like they make at Junior's. You can keep your French or Italian cheesecake with the soft fluffy texture. I want a dense tangy cream cheese overload slice of cheesecake. However, I wanted to make it mine somehow so I tweaked a few things to my liking. Junior's is missing texture. So, I switched out their sponge-cake crust with a graham cracker one. And, I cut down on the sugar a bit knowing that the strawberries are sweet enough. Lastly, I cut out a whole eight ounces of cream cheese for a few reasons. Junior's is almost too dense. It gets stuck to the roof of your mouth like a peanut butter sandwich on white bread. Plus, it was a little trick to cut down on the calorie count (and cost) this way you could eat more of it, and feel less guilty. This is the only way I would attempt to "lighten" a cheesecake recipe. It was a gamble, but I think it worked well.

One more preachy point about the strawberries, this recipe really does benefit from the sweetness of a fresh-in-season strawberry. But, if you're craving it past strawberry season, it's still a cheesecake recipe and it would work with any seasonal fruit. I'm really not ready for strawberry season to end, not one bit. Luckily, summer is just starting, so I guess I'll just have to come up with a "Best Dessert" for each fruit that appears in the market.

Seasonal Strawberry Cheesecake Bites Adapted from Junior's Restaurant Cookbook. Do not attempt this with low-fat cream cheese. Allow these to chill at least 6 hours, or overnight is best.

2 cellophane packs of graham crackers (about 18) 5-6 tablespoons of unsalted butter, melted 3 8 oz. packages of good quality cream cheese, at room temperature 3/4 cup sugar 1/4 cup cornstarch 3/4 teaspoon vanilla 2 eggs 1 cup heavy cream 1/2 cup good quality strawberry jam Pint of fresh local stawberries

Preheat oven to 325 degrees Fahrenheit. Have handy four small muffin size tins. Do not grease or line them.

Make the crust - Break up graham crackers in thirds and place in a food processor. Pulse until they are fine crumbs. May need to break up a few small bits with your hands. Place crumbs in a bowl and combine with melted butter until all the crumbs look wet. Take about a teaspoon of crumbs and put in each muffin slot. Press down with your fingers until flat. Chill the tins in the fridge while you prepare the filling.

Make the filling - Using a stand mixer place one bar or 8 oz of cream cheese in the bowl with the sugar. Mix for about 2 minutes on low speed until sugar is completely incorporated and mixture looks creamy.

Add the cornstarch and mix to combine. Then add the remaining two bars of cream cheese and mix for another 2-3 minutes or until it looks creamy and smooth. Add the vanilla, mix. Add one egg at a time, mixing until it is incorporated into the batter. Last add the cream and allow to mix for about a minute until texture is creamy again, not liquid-y.

Using two tablespoons spoon mixture into the mufffin tins. Once they're all full, take the jam and break it up a bit with a fork so that it is not so chunky. Place about a teaspoon on each cheesecake and using a toothpick or the end of a knife, swirl it into the top of the batter.

Bake cheesecake bites for about 20-25 minutes or until edges look set and middle is only slightly giggly. Let cool on a wire rack to room temperature, then place in the fridge to cool completely.

Top each one with fresh strawberries before serving.

A refreshing potato salad for hot summer days

There are many different types of potato salad around the world, not just the bottled-mayonnaise-laden type you buy at a supermarket appetizing counter that most Americans (I know) grew up eating. Basically, wherever potatoes grow, people will have their version of how to eat them cold as a salad. So, when I set out to create my ideal version of potato salad, I decided to borrow inspiration from a smorgasbord of cuisines.

My original thought was to lighten up the mayonnaise dressing on the salad, and go with a vinaigrette dressing instead. I wanted fresh bright flavors to make it the perfect accompaniment to summer meals. Potatoes can feel heavy on a hot day and I didn't want the dressing to weigh them down any more than necessary. German-style potato salad with the red potatoes and the vinegar-y dressing always sounds appealing, but often fails on flavor for me. I also wanted to keep it vegetarian friendly, so quick tricks to up the flavor, like adding bacon, was something I wanted to avoid.

I had seen a recipe for the Potato Gribiche they serve at Rose Bakery, in Paris, and immediately knew that had to be my inspiration, with the capers and the lemon-y vinaigrette. But, it all came together when I decided that I was going to use classic Scandinavian flavors like dill and whole-grain mustard. If you don't like dill (which is really an under-utilized herb in my opinion), you could substitute flat-leaf parsley. But, you really should give the dill a try.
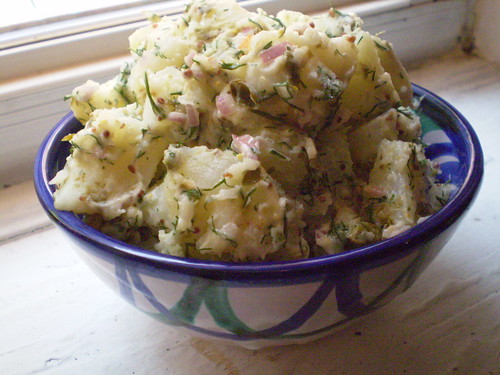
At this point in my cooking, I'm finally (FINALLY) getting out of my baker-dessert mindset and am starting to feel confident without a recipe. I know the components of a vinaigrette and just winged it with what I had. I made a quick lemon-whole-grain mustard dressing and poured that over the warm boiled potatoes and some chopped shallots, capers and fresh dill. I ended up adding just a spoonful of mayonnaise after tasting it without it. It just seemed to tie the ingredients together and add a familiar creaminess and tang that I love about potato salad. After all, no matter how exciting other cuisines are, a touch of home will always feel right too.

Potato Salad It's great warm or cold, and the leftovers work well the next day.

1 1/2 lbs. small red potatoes, peeled (if you choose) and diced 1 large shallot, minced 1 garlic clove, minced 2 tablespoons, capers, drained and chopped 1 handful of dill, chopped Whole-grain mustard - lemon vinaigrette (recipe below) 1 heaping tablespoon of mayonnaise

Peel and dice potatoes and put into a large pot with enough water to cover. Bring to a boil and cook until fork tender. Be careful to not over cook them, or you'll have mushy potato salad.

While the potatoes are cooking, chop the shallot, garlic, capers and dill. Set aside. In a large bowl make the vinaigrette. Taste and make sure all the seasoning are correct. When potatoes are cooked, drain well and add to the bowl with the dressing and other chopped ingredients. Toss gently to combine. Add the mayonnaise last and gently combine taking care not to mush the potatoes. Chill if not using immediately.

Lemon-mustard Vinaigrette 1/2 cup of extra-virgin olive oil 3 teaspoons of rice wine vinegar 1 heaping teaspoon of whole-grain mustard 1/2 lemon squeezed salt & pepper to taste

Put all ingredients in a bowl and whisk to emulsify.

Best Desserts - A Benefit for The LAMP with some fabulous food bloggers and yours truly

I'm baking again, for another great cause. This time it'll be part of a fun-filled benefit to raise money for a great organization, The LAMP, which supports media literacy skills. I'm not sure what I'll be making, but I do know that you'll get to taste all the goodies from myself and the other contestants. And, of course sweets are that much sweeter when you eat them for the sake of charity. I'll see you there!

Click here to buy your tickets in advance.

I went to San Francisco and ate and ate and ate

I went to San Francisco last week for a long overdue vacation and for my birthday. Hands down, San Francisco is my favorite city in this country, and one that I hope to live in eventually. The city is colorful and filled with pretty things to ogle at but only half an hour from the dramatic and gorgeous scenery that make California, well...not New York. I'm a big fan of all the views of the bay that sneak up on you after you walk up a hilly block. But, most importantly for one interested in local foods, going up to the city by the bay is like hitting the agricultural jackpot.

DSCN0407.JPG

DSCN0372.JPG

We stayed in a quiet hilly part of the city called Bernal Heights. It's bordered by the Mission District, where we spent a lot of time and ate a lot of amazing Mexican.

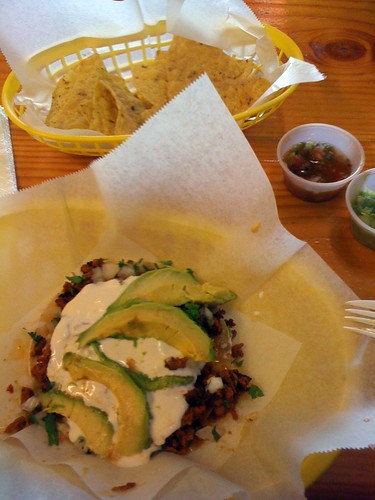
chorizo super taco

DSCN0363.JPG

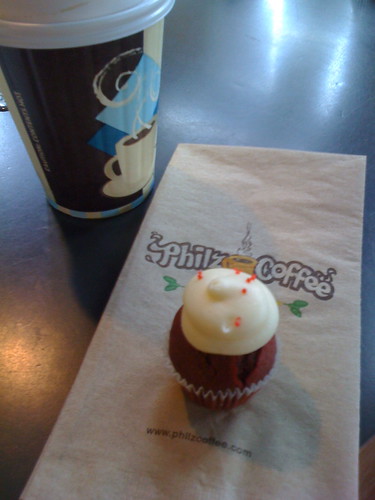
Requisite birthday cupcake at Philz Coffee birthday cupcake

It was hard to leave, but it always is.

DSCN0371.JPG

DSCN0420.JPG

Madeleines for GrandmaMa's Day

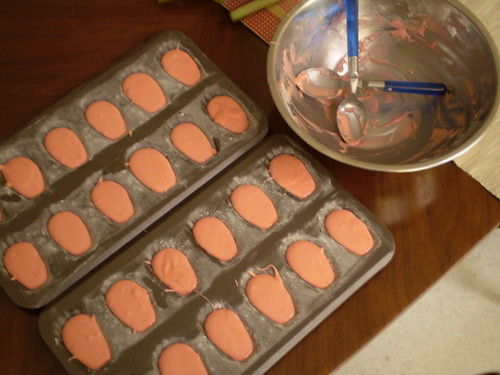
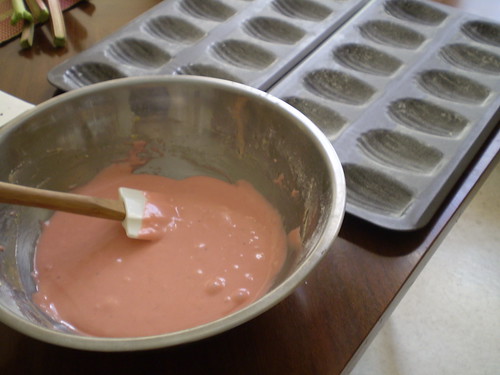
Mother's Day for me is all about "Ma." She's been filling in for missing mothers in my family for more than twenty years now. As the years have gone on, she's taken on even more "children." Being a mother, is what she does best. She never had a professional career, although she would have made a hell of a teacher / bookkeeper / nurse / psychologist / personal assistant. I know because she's been busy playing all of those roles to an impressive amount of "children" consisting of her kids, grand-kids, great-grand-kids, nieces, and neighbors, for all these years. She isn't a grandmother like ones that you always hear about, cooking big meals from scratch of recipes from the old-country (she prefers the ones on the back of the box), or one with tales from a glamorous past from days long ago. She's sweet and simple, unfussy almost to a fault. She's wise and strong, and has only gotten more so with age, but she's also hysterical, and someone who can make you feel instantly comfortable. If she had a culinary equivalent it would be the Madeleine... even if she doesn't know what they are. Madeleines are little tea cakes that you can serve at breakfast, brunch, tea time or dessert. If you are like me and my Ma, you'll think most times are acceptable for a little something sweet. They are well-known as being associated with Marcel Proust's writings on involuntary memory. (More about that here). However, despite their fancy little shapes and associations, they're actually a snap to make, if you get yourself the proper pan. (I normally wouldn't advocate buying a one-trick pony pan, but these little cakes are great for party favors and all sorts of occasions, that I think you'll get a lot of use out of it). The traditional flavoring is a little lemon zest and vanilla. That is how I normally make them. In honor of Ma, I wanted to try to flavor them with strawberry, which turned out very nice too. The jam I used did nothing to change the color of the cake, so I cheated with a bit of pink food coloring. I know, I know, but pink seemed so much more festive. It was only a drop too. If you can find strawberry extract that might eliminate the need for the food coloring. I checked three stores, but I couldn't find it. I think the flavor from using jam is probably preferable anyways.

Bake these and give them out as Mother's Day gifts to friends or family, if you won't be celebrating with your mom. You pretty much can't mess these up, unless you over-bake them, so watch them towards the end. They're a classy choice, making it seem that you went to the extra trouble to think about someone other than yourself. Exactly what the best Mas in the world do naturally.

Strawberry Madeleines Adapted from Bon Appétit.

2 eggs 2/3 cup sugar minus 2 teaspoons 1/2 teaspoon vanilla 2 1/2 tablespoons good quality strawberry jam Couple of drops of pink liquid food coloring (optional) Pinch of salt 1 cup of all-purpose flour 10 tablespoons unsalted butter, melted

Preheat oven to 375 degrees Fahrenheit. Butter and flour madeleine pans well.

Melt butter and set aside to cool. Beat eggs and sugar in a large bowl with an electric mixer till blended. Beat in vanilla, jam, and salt. Beat in food coloring if using till batter is desired color. Add flour and beat until just blended.

Gradually add cooled melted butter to mixture, beating until just blended.

Spoon one tablespoon of batter into each cake shell. Bake until puffed and edges are lightly golden, about 12-15 minutes. Cool in pan for 5 minutes, then remove from the pan and finishing cooling on a wire rack.

Carrot coins in cilantro salsa

It's springtime and one of the things you can find at green-markets around looking lovely are big bunches of carrots. Maybe it's just me, but I feel like because carrots aren't trendy and tend to stick around longer than some other seasonal favorites, they often get overlooked for things like ramps. It's like baby got stuck in the corner, and it's not right. Sure, carrots are good for you and a workhorse for stocks, stews, and most slow winter cooking. But, the slender bright orange bunches of carrots you can find in the market now deserve to be the stars of a dish all their own.

Carrot salads are a good start, but I find briefly cooking carrots really brings out their sweetness. The truth is, I don't really love raw carrots, and would choose a celery stick over a carrot stick any day. Sure cooked carrots are tasty slathered in butter, like most things, but I wanted something a little lighter than that. When I was little, my grandma always used to make us take notice if she put together a dinner plate with lots of different colors on it. Little did she know, her choice of different colored foods was actually a good way to measure how healthy dinner was that night. (Although from high school through college mac and cheese from the box was my orange colored food of choice). Orange foods are high in beta-carotene and vitamins A and C. Paying attention to the color of your foods is actually an easy way to make sure you're eating a well-balanced meal. Click here for more examples. I've been paying attention to different ways to prepare carrots to find more ways that would appeal to me, anything but that dreaded bag of mini carrot sticks that I can't seem to escape. Has every woman in the U.S. been brainwashed into thinking the only way to stay thin is to eat nothing but mini-carrots?! Ugh.

I first made this cilantro salsa a few nights ago for some pork tacos that I was making. I was excited that it needed exactly the herbs I had growing in my windowboxes . This sauce is incredible. It would be perfect over any grilled meat or fish, and just the smell of it made me think that I would win over a lot of people if I served it that way. I immediately thought about all the things I envisioned myself doing with this sauce throughout the summer. Then I saw these carrots in the back of my fridge yesterday and I thought this sauce was so good I bet slathering carrots in it would work. I started by slicing the carrots very thin, thinking they'd taste even sweeter the thinner they were. I knew I didn't want to try grating them because grated carrot salads sometimes seem too weighted down with dressing for me, and a grated carrot salad is never as crunchy as a slaw. But these little coins retained their bite even after a brief dip in boiling water. I can't take credit for the pairing, because that is all Debra Madison's genius. I can only take credit for the fact that you now have no excuse to ignore the carrots at the market the next time you see them.

Carrot Coins in Cilantro Salsa Adapted from Debra Madison's Vegetarian Cooking for Everyone. This salsa is completely addictive and you'll find yourself wanting to put it on everything. If you like capers they'd be great tossed in here as well.

Peel and slice 1lb. of carrots (or less depending on how many your feeding) into paper thin coins. The thinner they are the faster they'll cook. Toss in a pot of salted boiling water for about 5-10 minutes, or until fork tender. Remove and rinse in cold water to stop the cooking. Drain and toss with the cilantro salsa . Serve warm or chilled.

Cilantro Salsa 1 jalapeño chile, seeded 1 bunch of cilantro 1/2 cup fresh mint leaves 1-2 garlic cloves 1/2 cup olive oil 1/4 cup water Juice of 1 lime 1/2 teaspoon ground coriander Salt & pepper to taste

Chop all the herbs and garlic very finely. Mix in lime juice, water and oil. Then stir in spice and season to taste.

A bake sale at the Brooklyn Flea is music to my ears

There have been a lot of fun things that happened since I started this blog, but tomorrow might top them all. Two of my favorite things, baking, and going to the Brooklyn Flea on weekends, are coming together in the name of charity. I'm going to be donating some baked goodies to the Food Bloggers Bake Sale booth at the flea market this weekend, which is part of the national Share Our Strength Bake Sale happening around the country this weekend. All the monies raised go to fight childhood hunger in America. Click here to find a sale in your area this weekend and learn more.

If you're around NYC this weekend, come down to the Brooklyn Flea and buy a treat or three. The list of offerings that some local food bloggers are donating range from the classics to the extremely ambitious. I'll be bringing my lace cookies because they're always a hit, and I'm going to make cheesecake brownie bites, inspired by Smitten Kitchen's gorgeous looking recipe that I've needed an excuse to try. All the info you need to know about the sale, and the bloggers participating (and more importantly, what they'll be baking) is on Jacquie's blog , The JLH Life. And, as an added bonus, yours truly will be at the stand from 3-4pm. Come by and hi, kisses hello are free, but the cookies you have to pay for. Hey, it's for the kids!

What to do with matzoh

March 073.jpg

Newsflash - matzoh covered with caramel and melted chocolate is good. It's stand over the stove and greedily eat half a tray good. The kind of good that you will actually want to eat any time of the year. So why post a recipe for something this basic?  Well, I've seen and tried a fair number of chocolate-covered matzoh in my day, and well, frankly matzoh may be one of the few foods on earth that doesn't improve when covered in chocolate. It's that bland. I always assumed that was because the only good food you could find that was kosher for passover, was food that just didn't involve matzoh in any form. In general, with the exception of matzo-ball soup, I figured Passover was mostly filled with culinary creations meant to make you feel sorry for yourself that this holiday wasn't celebrated with chocolate-shaped bunnies. But, this Sunday, one night before Passover began, a culinary miracle was being prepared in my friend Shana's kitchen. Chocolate-caramel-covered matzoh that actually made me think, if it's possible to make matzoh taste good, it's possible Moses parted the Red Sea (for a brilliant illustration of this Biblical story click here).

Matzoh, the unleavened, cracker-like bread product that Jewish people eat in place of bread during the holiday of Passover (hey?! some people might not know) while, pleasantly crunchy, has the flavor profile of food you eat while getting over a stomach virus. So, when I sat down to think about my favorite Passover dessert foods, I didn't get very far. I am a strong believer that the desserts that are flour-free by choice are the best bet for this holiday, flour-less chocolate cake, flans, and nut-based cookies and cakes. But, those aren't always the simplest to make and in the interest of time (no one really gets off from work for this holiday) and as a great idea to make with any kids that may be around, I thought I'd post this recipe, along with some other really really simple Passover dessert options that have managed to win me over in recent years.  Funny enough, all my favorites come from who else, Martha Stewart. And since she improved on Passover desserts, I'd like to propose we make her an honorary member of the tribe, if she wants to accept. Here are some links to her Macaroon recipe (shredded coconut "cookies" that are customary) and a Matzoh Bark recipe, that easily adapts to any tastes and is simple enough to be a pre-school cooking project. Both of these recipes I make without changing a thing, accept how you choose to decorate. MacaroonsMatzoh Bark

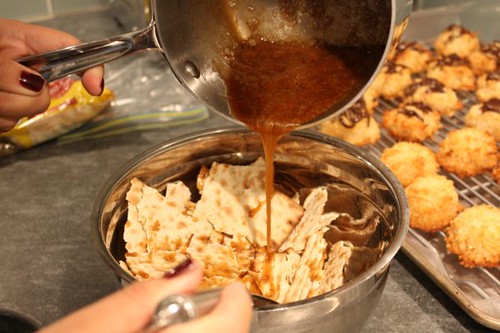
This chocolate-caramel matzoh recipe is Martha's as well, and my favorite of the three. And to be honest, you could make it without a single change and be quite content with the results. The combo of the slightly salty caramel with the crunchy texture of the matzoh and almonds is hard to improve on. But having made it a few times already in the past two days (it's completely addictive) I think there are a few tweaks that make it work a bit better and quicker. I shortened the cooking time a bit, and most importantly I wait to break up the matzoh until the very end, which leaves you with less crumbly little pieces. (Although this also leaves less for the cook to snack on). This matzoh will definitely do for you, what no Passover dinner ever managed to do for me, help you forget about the missing basket of tinfoil-wrapped chocolate eggs, if just for a night or two.

Chocolate Caramel Matzoh

Adapted slightly from MarthaStewart.com

  • 4 sheets of matzoh
  • 1 cup of sliced or slivered almonds (or any topping you'd prefer) 
  • 1 stick of butter
  • 1/2 cup of brown sugar
  • 1/2 teaspoon of kosher salt
  • 2 tablespoons of water
  • 1-2 cups of chocolate chips (or any chocolate you have on hand, melted)

Preheat oven to 325 degrees. Line 2 baking sheet with parchment.

Place 2 sheets of matzah on each sheet and scatter almonds evenly on top. Set aside to make the caramel.

In a saucepan, bring butter, sugar, salt, and 2 tablespoons water to a boil over medium, stirring constantly. Working quickly, drizzle over matzohs. Using a heatproof spatula, spread mixture evenly to coat. Bake until golden, about 20-30 minutes. Watch carefully last 10 minutes so it doesn't burn.

Remove from oven; sprinkle with chocolate chips. Let chocolate melt 5 minutes; spread chocolate over matzoh. Don't worry if there are some spots without chocolate. Refrigerate until chocolate has set.

Break into pieces, and serve. (To store, refrigerate in an airtight container).

Muffins that adapt to the seasons

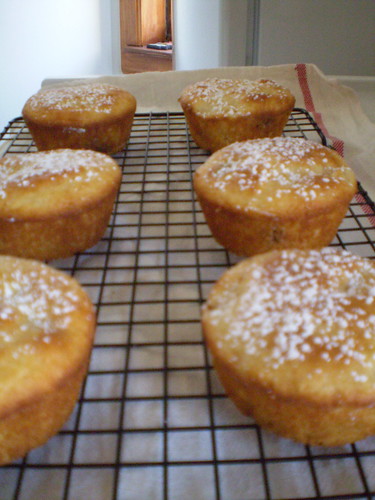
lemon-pear muffinsHappy Spring everyone! The weather is practically perfect and it seems everyone is outside taking in the sunshine. Which, is why you should get out of the house, away from the stove, and enjoy the weather. Time to start thinking about spring vegetables and before you know it, summer fruit. That's why I thought about these muffins. They're a basic muffin recipe flavored with fruit, and nuts if you want, which adapts to the season and what fruit is available in the market that day. They're an easy, effortless way to do a little home-cooking quickly, and produce a perfect little portable breakfast treat to take to the park, where you can sit in the sunshine with your dog, your friends, a newspaper, or all of the above. Muffins and me have had some ups and downs. When I was younger, blueberry muffins from a mix in a red box might have been one of the first things I ever baked. When I went to college, the store across the corner from where I had my classes sold muffins that were about one pound each. They were massive, and I ate one almost every time I had a morning class. Mostly sticking to the chocolate-chocolate-chip variety. By junior year, I realized that I was basically eating a large piece of cake for breakfast every morning and they weren't that exciting anymore. After a brief switch to brain muffins, I just quit on them entirely. I never touched one again for years. I decided they were unhealthy and boring. When I started cooking at home more, I gave them a try again since I had all these muffin tins, but I was a bit too preoccupied with the francophile infatuation I was suffering from post-college, and all I wanted to eat was flaky croissants in the morning (I wasn't concerned with the health factor of those cause we all know French girls are skinny).

These days, my tastes have come full-circle and I'm back to loving muffins. They serve as a great vehicle for jam and once they're a day-old they're even better toasted with some butter. The recipe I use is adapted from one I found in a magazine's cooking with kids section, so you really can do this. The addition of a bit of plain yogurt is what I think makes these much more moist and tender then other muffins. As more and more fruit comes into season, and some of it gets lost in your kitchen and gets a bit past it's prime, muffins are where you can use up over-ripe fruit. But, in all honesty, I must warn you, muffins are the baking gateway drug. Make them and you'll suddenly realize that baking is fun, you want to do more of it, and harder recipes will suddenly seem reasonable to try.

Fruit (and nut) Muffins Adapted from Delicious Magazine. Makes about 7 large muffins or 14 mini-muffins, or the recipe can be easily halved if it's just for you. Below are some seasonal fruit flavor ideas.

Basic Plain Muffin 1 1/3 cup all-purpose flour 3 1/2 teaspoons baking powder (original recipe used self-rising flour) 1/2 teaspoon salt 1/2 cup sugar 2 large eggs 1/2 cup yogurt (I used Fage brand, full-fat or low-fat is ok) 1/2 whole milk 1/4 teaspoon vanilla 1/4 cup (or a little less) cooking oil (any kind but olive)

Preheat oven to 350 degrees Fahrenheit. Grease whatever muffin tins you'll be using with butter. Sift dry ingredients (flour-sugar) into a large bowl using a mesh strainer.

Crack the eggs into a bowl and beat with a fork. Measure all your wet ingredients (yogurt - vanilla) and mix together with the eggs. Pour the egg mixture into the bowl with the flour mixture. Gently fold together until flour is incorporated.

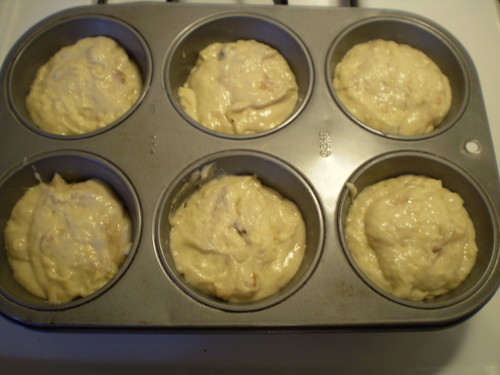
At this point add whatever fruit and nut mixtures you want to flavor the muffins (see ideas below) into the batter and mix together. Spoon the batter into the muffin tins until each muffin is about 2/3 full.

Bake for 25 minutes or until they are puffy and golden brown. Cool in the tin for about 5-10 minutes and then flip out of the pan to cool on a rack the rest of the way.
Fruit add-in ideas Spring: Apricots (ripe), chopped + pecans, chopped Juice and zest from one Orange + 1 mashed banana + handful of hazelnuts chopped

Winter: 2 Pears peeled and cored and chopped +zest of lemon and juice 1/2 of it + handful of raisins

Summer: Options are endless...but blueberries are a classic.