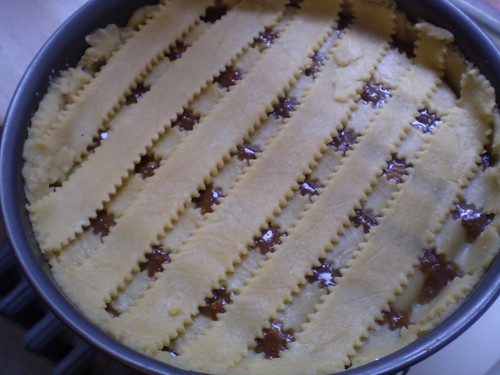
Carrot to the cake and my first guest post

I know some people who know some people who write a slamming blog filled with cultural news, cartoons, political discussion, the goings on around Miami, and so much more. I recently contributed a food post, for the best carrot cake recipe I've ever tried. Head over to The Heat Lightning to check out the recipe, hysterical news on The Jersey Shore in Miami, and how I really feel about cupcakes.

How'd you get so smart?

I'm so relieved that I can finally tell you about ThinkFood. It's been hard, waiting for the launch, but today's the day, and now you can know that I've had the honor to be a part of an unique new cookbook. ThinkFood, is a collection of recipes from food bloggers around the world with a common theme. All the recipes feature an ingredient that is considered brain food, or in other words, food that has been shown to have a scientific positive improvement on your brainiac ability. Maybe it'll even help you get better at Sudoku.

This cookbook is the brainchild (sorry) of a company called Posit Science. I didn't know about them before I heard about the project, but since then I've discovered their products, and in my opinion they're onto a great idea. Everyone could benefit from paying a little more attention to their brain health. I mean after all those years in college (and after) of abusing your brain cells (not me of course) it's probably a smart idea to do something that can have a positive effect on your brain now. The cookbook illustrates a tasty way to approach these concerns just by eating. The cookbook covers salads and appetizers, main courses, snacks, and of course desserts. Can you guess which category I picked?

Posit Science will distribute one recipe from the ThinkFood cookbook every Wednesday for the next 50 weeks to all who subscribe. This includes the print version of the recipe for free, more about the brain healthy ingredient in each recipe, and the blogger who contributed the recipe. The actual hard copy of the cookbook will be available for purchase in July. I've seen the list of bloggers who have participated, and I can promise you, this will be the best tasting "health" food you'll ever have.

Join ThinkFood's recipe of the week campaign, sign up here. (It's free).

Of course, my contribution to the cookbook was in the Dessert category, but you'll have to wait until it's my week to hear more...to be continued.

Learn more about Posit Science and their company here.

A bake sale at the Brooklyn Flea is music to my ears

There have been a lot of fun things that happened since I started this blog, but tomorrow might top them all. Two of my favorite things, baking, and going to the Brooklyn Flea on weekends, are coming together in the name of charity. I'm going to be donating some baked goodies to the Food Bloggers Bake Sale booth at the flea market this weekend, which is part of the national Share Our Strength Bake Sale happening around the country this weekend. All the monies raised go to fight childhood hunger in America. Click here to find a sale in your area this weekend and learn more.

If you're around NYC this weekend, come down to the Brooklyn Flea and buy a treat or three. The list of offerings that some local food bloggers are donating range from the classics to the extremely ambitious. I'll be bringing my lace cookies because they're always a hit, and I'm going to make cheesecake brownie bites, inspired by Smitten Kitchen's gorgeous looking recipe that I've needed an excuse to try. All the info you need to know about the sale, and the bloggers participating (and more importantly, what they'll be baking) is on Jacquie's blog , The JLH Life. And, as an added bonus, yours truly will be at the stand from 3-4pm. Come by and hi, kisses hello are free, but the cookies you have to pay for. Hey, it's for the kids!

Raiding-the-Cabinets-Roasted-Chickpeas

P1170074It is bitterly cold in Brooklyn this weekend. There is not even the promise of snow that could help me forget about how miserable this weather can be. The windchill is in the single digits and going outside seems like a very bad idea. I find myself stuck indoors, unprepared to face a weekend with only what I have in the cabinets. I opened, and re-opened the cabinet, hoping for something exciting I didn't notice the first five times I looked. Finally, I decided to reach towards the back and grab a can that had been in there for quite some time.  Canned chickpeas. No, I didn't want hummus. And, no making a salad wasn't an option, given the absence of anything green in my refrigerator. I decided today was the day to try making roasted chickpeas. Turns out, although it's not a quick fix for a snack, it is a versatile, economical, relatively healthy, easy option to know about when your best bet for something to snack on has to come out of a can.  P1170095 The recipe I used combined two different recipes for a Moroccan spice-mix version, to which I added a few adaptions of my own. It bears mentioning that a recipe for roasted chickpeas is like a game of telephone, each time the information is passed on, it changes a bit. I say this because I've come across tons of variations on how to flavor the little buggers as well as how hot your oven should be and how long to cook them. In fact, while I was prepping the chickpeas for the oven, and loudly cursing my crappy can-opener, my friend (who I was on the phone with) consulted her recipe for this dish and read me yet another very different interpretation of how to roast chickpeas.

That said, I think where this snack gets interesting is in how you choose to flavor the chickpeas. I liked the Moroccan spice mix just fine.  It did make my apartment smell like a shawarma restaurant, but it was an powerful flavor. I think these would also make a great Superbowl snack, flavored with some Creole seasoning as a nod to New Orleans, perhaps. Either way it was fun to make this little snack, and made me feel good about using what was already in my kitchen. I'm including a few different flavor options, depending on what's within your reach that day.

Roasted Chickpeas For flavor options, including the Moroccan Spice Mix I used, see below. Recipe adapted from Kalyn'sKitchen.com

2 can chickpeas, preferably organic 2T olive oil 1/2 teaspoon - 1 teaspoon spice mixture of your choice (go lighter on stronger flavors) salt to taste

Preheat oven to 400 F. Drain chickpeas into a colander and rinse well with cold water until no more foam appears. Let beans drain for 5-10 minutes, then pat dry (crucial step to avoid mushy chickpeas) and rub off any of the translucent skins that may be falling off.

When beans are well drained and dried, toss with olive oil, spice mix of your choice, and salt. Arrange in single layer on large baking sheet. Roast 40-50 minutes, or until they are slightly browned and make a rattling sound when you shake the baking sheet and appear crunchy enough for you. Testing one is your best bet. Serve warm or let cool.

Moroccan Spice Mix 1 3/4 tsp. ground cumin 1 tsp. ground coriander 1/2 tsp. chile powder 1/2 tsp. sweet paprika 1/2 tsp. ground cinnamon 1/4 tsp. ground allspice 1/4 tsp. ground ginger 1/8 tsp. cayenne pepper

Creole Spice Mix 2 tablespoons paprika 1 tablespoons salt (I lowered this because of salt in the original recipe) 2 tablespoons garlic powder 1 tablespoon freshly ground black pepper 1 tablespoon onion powder 1 tablespoon cayenne 1 tablespoon dried oregano 1 tablespoon dried thyme

Other Ideas Spicy version - add 2 teaspooms of chili powder + a few dashes of hot sauce. Salt &Vinegar - toss roasted chickpeas cider vinegar and sea salt to taste. Indian inspired version - add 2 teaspoons of garam masala.

Roasted Chickpeas With A Creole Spice Mix on Foodista

Gingerbread Cookie Decorating Party

PC130198.JPGI love gingerbread. It is a holiday classic. It may not be inventive or cutting-edge, but not everything should be. The recipe I follow came from Bon Appetit's December 2006 issue. It is slightly spicy, with a deep brown-sugar and molasses flavor. It puts a twist on tradition by suggesting you flavor your icing with juniper berries. This part I could take or leave. I know there are a million and one gingerbread recipes out there, and every year I say I'm going to experiment with others, but for the last three years all those who have tried them seem to love them so that I haven't found a reason to mess with a good thing. I wanted to share this recipe with you in case your looking for a well-tested classic version. PC130180.JPG I normally make these cookies at least twice during the holiday season. The first batch always seems to disappear before being wrapped up and gifted out to friends and family. The only changes I've made to the original recipe are switching out light brown sugar for dark, and using unsulphured blackstrap molasses in place of regular. It's a subtle change that make for a more intense cookie. It is the perfect cookie to practice your decorating skills on (and I learned I could use a LOT more practice) and make into a snowy weekend project. This batch was made after a wonderful holiday brunch my cousin hosted during Hanukkah. It was too cute to see four people each measuring out different ingredients and generally buzzing around the table. mosaic62cb9d129a8a15fe6a2da6004ae037425bbca69e mosaic05fb6e7b331d4d03440f57c3877176aaa71cd18b After the dough rested, we set up two separate rolling stations (photos at this point were getting a bit blurry after a few mimosas) and went to work lining up the cut out shapes on silpat or parchment-lined baking sheets. This would be perfect work for little kids, but the only kid we had on hand was still too little to help. Not that any of us big kids seemed to mind handling the task. These cookies bake up crisp, and the thinner you roll them out the crisper they will be. We went with about 1/4 inch thickness on the dough to have them be a bit more chewy. They also need to be carefully watched towards the end of the baking time, unless you don't mind them a bit well-done around the edges (I save those imperfect ones for myself). PC130194.JPG Once they're baked, let them cool and prepare the royal icing to decorate as you wish. That's when the real fun comes in. This time around we skipped the juniper flavor used in the original recipe (of course if you want to give the juniper a try, find it here). We used lime juice in place of lemon juice for the royal icing, simply because we were out of lemons. But we all agreed the lime was a nice little twist that we would make again. We used Martha Stewart's royal icing recipe, and it was a very good thing.

Gingerbread Cookies Adapted from Bon Appetit. See links above for two different icing options.

2 1/4 cups unbleached all purpose flour 1 teaspoon ground ginger 1 teaspoon ground allspice 1/2 teaspoon ground cinnamon 1/2 teaspoon baking soda 1/2 teaspoon salt 1 cup (2 sticks) unsalted butter, room temperature 1/2 cup (packed) dark brown sugar 1/4 cup blackstrap molasses

Whisk first 6 ingredients in medium bowl. Beat butter and sugar in large bowl until fluffy. Beat in molasses. Beat in dry ingredients. Gather dough; divide into 4 pieces. Shape into disks. Wrap; chill at least 2 hours and up to 2 days.

Preheat oven to 350°F. Line 2 baking sheets with parchment. Roll out 1 dough disk to 1/8-inch thickness. Using 3 1/2-inch cutter, cut out cookies. Transfer to sheet. Gather scraps; chill.

Bake cookies until almost firm in center, 12 minutes. Cool on sheets 2 minutes, then cool on racks. Repeat, using all dough.

Note: Cookies can be stored in an airtight container at room temperature up to 3 days or freeze up to 2 weeks.

Holiday Lace Cookies

PC160250.JPG You know these cookies. You've seen them in the cookies by the pound section of the bakery case. You've even eaten them before and loved them, most likely without knowing their name. They're an old-fashioned cookie, generally known as Lace Cookies because of their porous looking appearance. It appears there are lace cookie variations from one European country to another (like most cookies). French lace cookies were traditionally made with almonds, while Irish lace cookies were made with oatmeal and milk or cream, and German lace cookies are also oatmeal-based cookies, but with ginger, cloves and cinnamon added. My recipe came from the Fannie Farmer Cookbook, originally written to help bring some consistency to our young country, by creating recipes that were formulas. Fannie (as I like to call her) Americanized things in the process by removing any country of origin, and simply called them Lace Cookies. Additionally, many newer American versions today call for corn syrup, but I prefer to bake with butter when I can.

PC160213.JPG

I'm entering this into the Share Our Strength, 12 Days of Sharing cookie jar. (A great cause, read more about it at In Jennie's Kitchen).This cookie recipe should be categorized under, Stupidly Simple, because it is. Mix dry ingredients in a bowl. Pour melted butter over it, then a beaten egg and some vanilla. Drop onto a cookie sheet and bake. Nothing more too it. It's the kind of recipe you'd be well-served committing to memory to whip up off the top of your head while visiting family, or away for the weekend skiing. The results would impress your onlookers and fool everyone into thinking your a culinary whiz in the kitchen. Sit back, smile, and think, "Ha, ha."

There's only a few tricks to know how to pull this recipe off without a hitch. First, you must must space the cookies at least 1 1/2 inches to 2 inches apart, depending on the size of your cookies. Second, you should stay close to the oven while these babies are baking. They go from well-done to slightly burnt quickly. My suggestion is to keep the oven light on (if you have one) and keep an eye on them after they've been in there for 3 minutes. Plus, it's fun to watch the cookies bubble away and bake. Third, you really must use some patience and give them a few minutes to cool before you try to move them off the cookie sheet. If you slide your spatula under one while it is still hot it will squish into the middle and resemble a piece of caramel. That is an irreversible error. Obviously it will still taste good, but baked goods should also look good too.

mosaic12198e095cd8ebebc96159ac667b67bc5cd6a1fe

mosaice19e9f8404f44b4fbc21594743037eefd1237261

This being a holiday cookie, you should consider some options to gussy up your cookie creation. Consider shaping the cookies into a tuille by bending them around the handle of a wooden spoon while still warm (not hot). Then let them cool in that shape. This is a pretty example of how a tuille shape makes a more impressive presentation. My personal favorite is the way I had them as a kid, where the bottom is coated with melted chocolate. Yum. And, coating things with chocolate seems like a good task to include the kiddies in on. (Personally, I wish someone had let me do that as a kid, rather than play with a dreidel. I'm just saying.)

PC160245.JPG

Holiday Lace Cookies Adapted from The Fannie Farmer Cookbook

1 1/2 cups uncooked oatmeal (not anything instant or quick-cooking) 1 1/4 cups brown sugar 2 tablespoons flour 1/2 teaspoon salt 2/3 cup (about 10 tablespoons) melted butter 1 egg, lightly beaten 1/2 teaspoon vanilla

Preheat the oven to 350 degrees Fahrenheit.

Mix the dry ingredients together in a big bowl. Melt the butter. Add to the dry ingredients and mix to combine. Add the egg and the vanilla and mix until all incorporated.

Line a baking sheet with a silpat or parchment paper. Drop cookies about 1/2-1 teaspoon at a time onto cooking sheet. Take care to keep them spaced about 2 inches apart. They will look small but will spread as they bake. Bake in the oven for 5 minutes or until firm. Watch them closely after 3 minutes, depending on how well done you want them. Let cookies cool on the baking sheet for a few minutes before you touch them. Carefully, using a spatula lift off baking sheet to cool completely.

12DaysCookies_badge-1

Fourth-Night-Hanukkah-Huevos

PC140206.JPGI did some Hanukkah food research today, and to my surprise there are two schools of thought. One belief is that holiday foods must be fried, while others merely require the food be cooked with olive oil. The holiday foods I grew up with were always fried, so I assumed that is what they needed to be. But after consulting with the all-knowing, all-seeing internets, I realized that there are sources out there that do not feel the frying aspect is necessary. Despite fried food's deliciousness, I decided that I don't need to celebrate this particular miracle from thousands of years ago with trying to create my own miracle (namely not gaining a pants size or clogged arteries from eating fried food for 8 days). I'm going with the more sensible, "cooked with olive oil" tradition.

With that cleared up, I proceeded with a quick light supper (borrowed from my brunch repertoire) of Huevos a la Mexicana. It is basically eggs scrambled with the colors of the Mexican flag, green (chiles), white (onions), and red (tomatoes). It is another one of these modest dishes where a few very ordinary ingredients combine to make a fine meal. I always serve these egss with small corn tortillas for a more authentic flavor then the supermarket flour type.

Cook the onions in miraculous wonderful olive oil until translucent, then add the chiles (leave the ribs on for a spicier version), and the tomatoes. Cook for about 5 minutes until some of the juice from the tomatoes renderss out a bit, and the chile is no longer raw. Then pour in some beaten eggs and mix it altogether. Cover and let the eggs set. That's it, nothing fancy. Although this is not holiday fare to serve your relatives, it is technically within keeping with the tradition. It will allow you to bravely plough through one of the eight days without feeling remorse for subsisting on fried food and holiday cookies for the next week (or two). Viva la revolución!

PC140210.JPG

Hanukkah Huevos (a la Mexicana) Adapted from Mexico, The Beautiful Cookbook.2 tablespoons olive oil 1/4-1/2 onion, chopped 2 chiles, finely diced (serrano or jalapeno) 1 tomato chopped (or about 3/4 cup of diced canned tomatoes) salt 3-4 eggs, lightly beaten


Heat the oil in a skillet. Add the onion and saute until transparent. Add the chiles, tomato, and salt and cook over medium heat for about 5 minutes. Add the beaten eggs to the pan and stir to incorporate. Cover and cook for 2-3 minutes or until eggs are set. Break up with a wooden spoon once done. Serve with warm corn tortillas.

A-Smashing-Chicken-Potato-Tomato-Bake

PC040134.height=

Simple pleasures are best, right? Well, dinner tonight was simple, so I guess that's why it was also the best one I've had in quiet awhile. I made an improvised winter version of a Jamie Oliver recipe for chicken thighs. Seasonal swaps included - summery cherry tomatoes for good quality canned Italian ones, and fresh oregano for some rosemary. I made do with skinless chicken this time, although the alternative would have been much better since the recipe called for frying the chicken until three-quarters of the way cooked first. I missed out on crispy skin, but this extra step (rather than just throwing it all in a pan to bake) was such a great idea that I got a good sear on mine and it still turned out delicious. This one's a keeper folks. A word about chicken. Chicken thighs are the best part of the chicken. I think if you have to choose one part to cook, that's the one you should go with, it's hard to mess up really. It's white meat's, more juicy cousin. The expression, "juicy thighs" must have it's origin from a man who knew his way around a chicken. (Ok, I may have just grossed myself out there, but maybe now you'll remember it). I didn't even realize I really liked chicken until I made the switch to using dark meat after eating one too many chicken strips in salad that tasted no better than styrofoam popcorn.

The genius of this simple recipe is that it is cooked in separate parts almost completely, and then bakes together with a vinaigrette poured over for flavor. The result is crispier chicken and perfect roasted potatoes. It was hearty but not heavy. I finished it with a dash of balsamic vinegar right before I served it because I just love balsamic and rosemary together. It was a success despite the substitutions. This rustic chicken bake is a simple pleasure you should try, but would you mind coming over and doing my dishes for me first? That would be lovely.

Chicken Potato Tomato Bake

Adapted from Jamie at Home, by Jamie Oliver.

1 lb. small potatoes (new potatoes, red potatoes, whatever is in season) 6 boneless chicken thighs, preferably free-range, antibiotic free chicken Olive oil 1 14oz. can of diced or whole tomatoes, drained of juices Fresh rosemary, a few sprigs Red wine vinegar and balsamic vinegar

Scrub the potatoes and put them to cook in a pot of boiling, salted water.

Preheat oven to 400 degrees Fahrenheit.

Clean chicken and cut each thigh into 2-3 pieces. Put in a bowl and toss to coat with a few tablespoons of olive oil and kosher salt and freshly ground pepper. Heat a heavy oven safe skillet and fry chicken, skin side down until almost cooked, about three quarters of the way done. You may need to do this in batches. Don't move the chicken or flip it or you'll lose the sear.

When potatoes are fork-tender, drain and place in a bowl. Lightly smash each one with a fork. Set aside. Drain tomatoes and set aside.

Make the vinaigrette either in a mortar and pestle or finely chop the rosemary and muddle with about 3 tablespoons of olive oil and 1 tablespoon of the red wine vinegar, and pepper.

Once all the chicken is cooked, place it all back in the pan with the potatoes and tomatoes tucked in around it. Pour the vinaigrette over the pan and bake in oven for about 25 minutes, or until chicken is no longer pink. Before serving, splash a bit of balsamic vinegar over the dish.

Peanut-Sesame-Soba-Noodle-Salad

Cold sesame noodles are ubiquitous on Chinese take-out menus but I've never been a huge fan. The cold sticky sloppy mess of noodle just never appealed to me as much as other options. Then one day I was looking around for something to do with soba noodles (Japanese buckwheat noodles, if you're not familiar with them). They are one of my favorite healthy go-to staples in the pantry and what reminded me this would be a good submission for Fight Back Fridays. Soba are often served in noodle soups, or served cold with a dipping sauce. That is what gave me the idea for this dish. A noodle salad that I could whip up for work week lunches, as well as a light dinner that would be more substantial than a green salad. The items that you add in can be altered to suit your preferences or what's in your fridge that night.

A quick dressing of creamy peanut butter (all-natural of course), soy sauce, sesame oil, ginger, garlic and honey are blended together to make the dish. I think the peanut-sesame combo is the key here. Peanut-sauce is often too much peanut-butter flavor with nothing else. Here, when mixed with the soy sauce and enough heat (from red pepper flakes or sriracha) it is more balanced and, frankly more interesting than the one-note flavor it has on its own.

The only add-ins to this salad I strongly suggest be included are chopped scallions and cilantro, to keep with a South-Asian flair. These flavors just work together and brighten up the peanut-flavored sauce. The rest is up to you. Make a batch of this to have on hand during a hectic week of pre-Thanksgiving cooking madness. As long as the dressing is made, you only have to take the 3 minutes to boil the soba noodles to pull it all together. Save yourself from greasy take-out in the weeks leading up to Thanksgiving. Or, take this for lunch the week after, because there are only so many leftover turkey sandwiches that any person should have to endure.

Peanut Sesame Soba Noodle Salad Adapted from Recipezaar. Do not dress the noodles too far in advance or they may get a bit soggy. For the dressing: 1/2 cup smooth all-natural peanut butter 1/4 cup soy sauce 1/3 cup warm water 2 tablespoons peeled fresh ginger, chopped 1-2 teaspoons fresh minced garlic 2 tablespoons rice wine vinegar 1 1/2 tablespoons sesame oil 3 teaspoons honey 1/2 teaspoon crushed chili pepper flakes or sriracha

For the salad: 1/2 package soba noodles, cooked and rinsed under cold water 3 scallions, chopped (green and white parts) 1 red bell pepper, seeded and cut into thick strips 1/2 cucumber, seeded and chopped 1 large handful of cilantro

Using a blender puree all the dressing ingredients until smooth (about 2 minutes). Alternatively, whisk all ingredients until they appear well combined.

Cook the soba in a large pot of boiling salted water until tender about 2-3 minutes; drain and rinse well under cold water to stop the cooking. Transfer to a large bowl, then add in the remaining salad ingredients.

Just before serving pour the dressing over the cooked pasta and veggies. Toss well to combine.

Testing-New-Thanksgiving-Desserts-Fig-Crostata

PB140051.JPG I'm a sucker for a pretty package, so when I saw the photo of the crumbly, flaky, lattice-topped fig crostata in November's Gourmet magazine, I instantly wanted to make it. I thought finding a new option for the dessert table on Thanksgiving could be a good idea. Then I remembered I come from a family of non-adventurous eaters, and die-hard traditionalists. It's apple or pumpkin or nothing. I figured that should not hold me back. I could bake this a week early, and find out for myself if it was as delicious tasting as it was attractive. Maybe it would be worth trying to convince my dining companions this Thanksgiving to give something new a try.

PB140029.<span class=

A crostata is an Italian form of pie made of a shortcake cookie-type of dough. It has as many variations and the internet is filled with recipes where a crostata dough is used as a free-form crust where the sides are folded around the filing, similar to a French galette.

PB140041.<span class=

This recipe is made in a springform pan, where the crumbly dough is rolled out and simply pressed into the pan and up the sides. That's easy enough. The lattice-top is a bit more involved. I'll admit anytime I've tried to make a lattice-topped pie crust it ends with a lot of cursing and frustration as my strips soften and fall apart as I try to place them on top. Inevitably I often throw my hands up in defeat and roll the whole mess into one big ball and try for a normal pie crust. But, I finally have figured out that the freezer is my friend and I can fix this problem by popping the strips into the freezer to flash chill if they get difficult to work with. This trick saved the day and made the intricate, impressive looking top easy enough for even novice bakers.

PB140045.<span class=

The filling smelled incredible while cooking and filled the kitchen with those warm spice aromas that we associate with the holidays. I'm sad to say that when it was all pureed and baked it tasted like an orange flavored fig newton. It was tasty, but the similarity to a fig cookie made it not that desirable as a holiday dessert. On the other hand, it also made it seem healthier than a pie and I ate it for breakfast today.

My official taste-test verdict? If you're a fig enthusiast, this pie is worth a try. But be prepared for the harsh reality that like me, you find that you are more like your family than you care to admit, and realize that it ain't turkey day without a pumpkin pie.

PB140060.<span class=

Fig Crostata Recipe from Gourmet Magazine, November 2009

For Pastry Dough 2 cups all-purpose flour 1/4 cup granulated sugar 1/2 tsp salt 1 1/2 sticks cold unsalted butter, cut into 1/2-inch cubes 2 large egg yolks 1 tsp vanilla extract 1 Tbsp cold water

For Fig Filling 12 oz soft dried figs, stemmed and coarsely chopped 1 1/4 cups water 1 cup fresh orange juice 1/2 cup packed dark brown sugar 1 stick unsalted butter, melted and cooled 3 large eggs, lightly beaten 1 tsp vanilla extract 1 tsp grated orange zest 1 1/2 cups walnuts, coarsely chopped

To make the dough: Blend together flour, sugar, salt and butter in a food processor just until mixture resembles coarse meal with some roughly pea-size butter lumps (alternatively do this in a bowl with your fingers). Add yolks, vanilla and water and pulse until incorporated and dough begins to form large clumps. Turn dough onto a lightly floured surface and divide into 4 portions. With heel of your hand, smear each portion once or twice in a forward motion to help distribute fat. Gather all dough together then divide dough in half and form each half into a 5-6 inch disk. Chill, wrapped in plastic warp, until firm at least 1 hour, or up to 3 days.

To make filling: Simmer figs, water, orange juice, and brown sugar in a medium saucepan, covered, stirring occasionally, until figs are soft and mixture is reduced to about 2 cups, 15 to 20 minutes. Pulse in a food processor until finely chopped (mixture should not be smooth). Transfer to a large bowl and cool slightly. Stir in butter, eggs, vanilla, zest and walnuts.

To make tart shell: Butter a 9-inch springform pan. Roll out 1 portion of dough between 2 sheets of parchment paper into a 12-inch round (dough will be soft; chill or freeze briefly if it becomes difficult to work with). Peel off top sheet of parchment and carefully invert dough into pan. (Dough will tear easily but can be patched together with your fingers). Press dough onto bottom and 1 inch up side of pan, then trim excess. Chill tart shell until ready to assemble.

Roll out remaining dough between parchment into 12-inch round. Peel off top sheet of parchment, then cut dough into 10 (1-inch wide) strips and slide (still on parchment) onto a tray. Chill until firm, about 10 minutes.

Assemble crostata: Spread fig filling in shell. Arrange 5 strips of dough 1 inch apart on filling. Arrange remaining 5 strips 1 inch apart across first strips to form a lattice. Trim edges of strips flush with edge of shell. Sprinkle top with sugar.

Preheat oven to 350 degrees Fahrenheit. Bake until filling is slightly puffed and pastry is pale golden, about 30 minutes. Cool completely, then remove side of pan. Gourmet suggests you serve crostata with mascarpone.

Zucchini linguine martini bikini Fritters

P7310198.JPGI made zucchini fritters the other night. A fine thing to make to use up some of the mid-summer abundance of squash. While I was standing there with my box grater, grating up zucchini I kept hearing Vince, this hysterically energetic infomercial guy who sells some chopping kitchen gadget. At one point in this particular commercial while he's demonstrating all the things you can grate, he says things like, "fettuccine, linguine, martini, bikini". Hey, what about zucchini, that rhymes too! (This guy has a ton of ridiculous lines one of my favorites being, "stop having a boring tuna, stop having a boring life" that I can't seem to get out of my head, probably cause his commercial is on once a morning while I'm trying to watch for the weather.) Anyways, if you haven't seen Vince in action, it's kind of funny in that infomercial way. Watch it here (localappetite does not endorse the use of this product, only the use of this kind of enthusiasm for cooking). P7300187.JPG In case you hadn't guessed by now, I've been on a one-dish kick this summer. It's insanely hot in my kitchen and basically when I have the time to cook, I'm not making entire meals. Something fresh and tasty that utilizes my CSA produce is basically the only thing that has been motivating me this summer. I've just been rounding out the meals with more cheeses, eggs, dips and fruit. It has been a good way to handle eating at home without being in the kitchen for too too long. I was a little hesitant to fry for these fritters. But, Nigel Slater's entry on the same in The Kitchen Diaries had been in the back of my mind for some time. The only essential step to this process is the time to allow the zucchini to sufficiently drain (see photo above) otherwise you'll end up with soggy fritters that will fall apart when you try to cook them.

The one surprising thing about this recipe was that it added an extra step, which although I followed, I think I would recommend you omit it. Instead of simply mixing the grated drained zucchini in a bowl with your binders, egg and flour, and then frying, he writes that you should saute it all in a pan first and then add the flour and egg and then make little balls and fry in a second pan. I thought he might be onto something (maybe it added extra flavor or helped to further dry out the squash?), but after cooking the recipe through, I think it was an unnecessary step, leaving you with an extra pan to clean. I wouldn't want to do that to you. Either way you do it, you'll end up with light and moist zucchini fritters, if you don't flatten them too much into more of a pancake shape. As you know zucchini works well with almost anything, but either feta or Parmesan would be interesting. I used dill for the seasoning, but definitely just go with what you like or have on hand. And just like zucchini itself, this dish is versatile and will go with whatever else was on the menu for that night. Or, if you're like me, it's ok to just eat this and save room for dessert. It's too hot to eat a big meal anyways, right? P7300193.JPG

Zucchini Fritters Adapted from The Kitchen Diaries, by Nigel Slater

3-4 zucchini, grated Salt 1 small onion, chopped 1 clove of garlic, minced 1/2 cup grated cheese, your choice 1 handful of fresh dill, chopped 1 egg, lightly beaten 2-3 tablespoons all-purpose flour Olive oil

Coarsely grate zucchini and place in a colander. Salt liberally and allow to drain for about 30 minutes. When ready to use take handfuls of it and squeeze out any additional water before placing it in a bowl.

Mix drained zucchini with the rest of the ingredients. It will be a slightly stiff mixture. Heat a heavy pan with enough olive oil for frying. Drop mounded tablespoons into the pan and allow to brown. Keep your eye on them as the oil gets hotter (they will cook very quick at the end) and take care when flipping the fritters as they fall apart easily (a spatula and a fork together worked best for me).

Easy-as-a-Summer-Day Cape Cod Cookies

It's a gorgeous summer weekend, the kind that really makes me wish I had a summer house (or more friends with summer houses). It's the type of weather that makes you wish you had planned a bit better in the winter to have some time set aside for a roadtrip to places that seem made for summer. Cape Cod is one of those special places, and it seems appropo that the cookies I made this week were inspired by its simple pleasures. These are the easiest, tastiest oatmeal cookies I know of. I baked these for my bi-monthly Dessert Corp contribution. (For more on Dessert Corp, see my earlier post on this great organization). They are the epitome of an easy dessert - no creaming the butter and sugar, and no special equipment is needed. Just you, your wooden spoon, and a big bowl.

This recipe comes from the Fannie Farmer Cookbook. This book has been sort of a cooking bible in my family. I have learned so much from this book, and still refer to it at times for information (although the Internet has been winning out lately - shhh!). These days I mostly use it for the baking recipes, as my culinary tastes have gotten a bit more exotic, but it is still an amazing reference book. Marion Cunningham included not 1, but 3 separate oatmeal cookie recipes in this book. I chose her Cape Cod version, only because the other recipe called for shortening, which is something I don't keep around and don't prefer to bake with.

I can tell you these cookies won't disappoint. They deliver a deeper, richer flavor than most oatmeal cookies I've tried, thanks to the addition of molasses. They are sweet and spicy, and warm and soft, the way the fresh-baked cookies of my dreams are. They are exactly the kind of cookie I imagine some storybook mom would serve up with a glass of milk to her kids after-school. Although, the feeling is just as nice for us grown-up kids when you bake a batch for yourself.

Easy-as-a-Summer-Day Cape Cod Cookies Adapted from The Fannie Farmer Cookbook. (These cookies work great frozen, so if you don't want to eat the whole batch, just spoon them out onto a cookie sheet, but instead of baking, place in the freezer until frozen, about an hour, and then store in a freezer-safe plastic bag. When ready to use, you can place them directly into the oven from the freezer, just increase the cooking time by 5 minutes.)

1 1/2 cups all-purpose flour 1/2 teaspoon baking soda 1 teaspoon cinammon 1/2 teaspoon salt 1 egg, lightly beaten 1 cup sugar 1/2 cup melted butter 1 tablespoon molasses (I use Blackstrap Molasses, which has a sweeter flavor than regular, if you can find it) 1/4 cup milk (reduced fat works in a pinch) 1 3/4 cup oatmeal 1/2 raisins (optional, dried cranberries would be nice too) 1/2 cup chopped nuts (optional)

Preheat oven to 350 degrees Fahrenheit. Whisk the flour, baking soda, cinammon, and salt together in a large bowl. Add the rest of the ingredients all at once (it'll work, don't worry) and stir together until everything is evenly incorporated.

Drop teaspoon sized cookies on a baking sheet. You may want to press them down a bit with the back of your spoon, as this batter doesn't spread much. Bake until edges look brown and cookies don't appear too gooey, about 10-12 minutes. Cool on a wire rack.