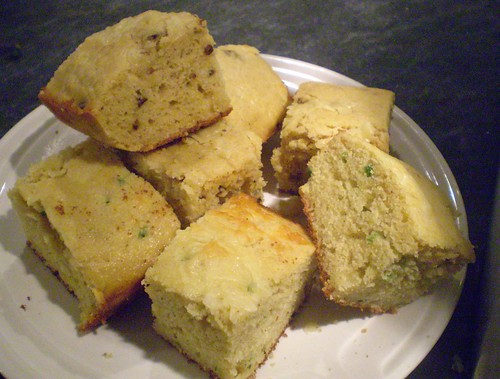
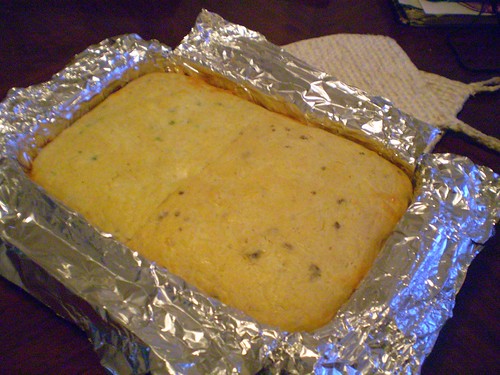
Smoky sweet chipotle cornbread

picnikfile_yHLC8o

Today is Superbowl Sunday, and while I confess to only recently accepting that Sundays are were for football watching, I've always been into the Superbowl, for what else? The food. I've progressed (just a little) since college when it was dips and Chex mix that I offered up. The last few years, I've been fortunate enough to watch at friends' houses where their tvs are bigger than mine, and their homemade pizzas or 5 gallon pots of chili are too good to compete with. So, that's why I decided to share with you my recipe for not chili, but cornbread, the perfect partner to chili. Despite this, it is often the overlooked dried-out bore that most people will happily pass over. This version is different, and best of all you'll actually want to eat the leftovers the next morning when you wake up feeling sick from too much wings and beer from the night before.

If you can, I'd suggest trying to find some coarse-ground cornmeal at the greenmarkets. Around the NYC area, there are quite a few farms reviving the local grains options. Here's a list of regulars at the greenmarkets, (check for the Cayuga brand too). Of course, a high-quality supermarket brand will work as well, just look for one that is stone-ground, which means that some of the hull and germ has been left in, which equals better nutritional value and flavor.

This cornbread is moist without being heavy thanks to the use of buttermilk, and is sweet but not cloyingly so. The sweetness really works nicely with the smoky flavor that a small amount of chipotles (the chipotles in adobo kind) diced up will add. You can of course, use jalapenos if you'd prefer. Or, do as I did, and make a double-batch, one half with chipotles, one half with jalapenos. I guarantee the leftovers will not go to waste, and that's the only thing I'll be waging a bet on tonight.

Smoky Sweet Chipotle Cornbread        

Adapted from Allrecipes.com. This recipe would work great as mini-muffins if you'd rather serve them that way. Just drop the baking time to 15-20 minutes. Serve any leftovers warm with a drizzle of honey for breakfast (or dessert). It also can be easily doubled for a crowd.
  • 1/2 cup unsalted butter
  • 1/2 cup sugar
  • 2 eggs
  • 1 cup buttermilk
  • 1/2 teaspoon baking soda
  • 1 cup cornmeal
  • 1 cup all-purpose flour
  • 1/2 teaspoon salt
  • 2 chipotles in adobo, diced finely

Preheat your oven to 375 degrees Fahrenheit. Grease your 8 inch baking pan (or 13x9x2 inch pan, if doubled), or muffin tins.

Melt the butter in the microwave, or in a small pot. While butter is melting, sift together the cornmeal, flour and salt. Set aside.

Place sugar in a large mixing bowl and pour in melted butter and stir together. Add eggs quickly mixing till smooth. Measure out buttermilk and mix baking soda into it before adding it to the batter. Add to the bowl and stir. Add sifted flour mixture to batter and fold in till completely incorporated. Add chopped chipotles and mix till distributed throughout.

Pour batter into prepared baking pan and bake about 30 minutes. Set on a rack to cool before cutting into squares.

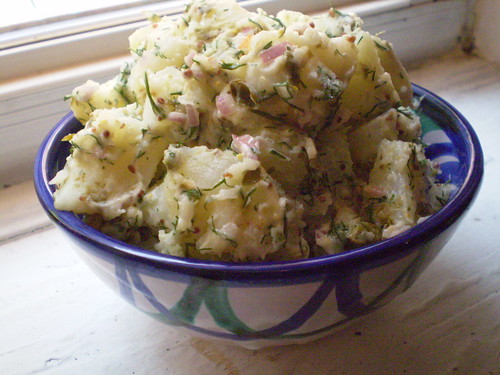
A refreshing potato salad for hot summer days

There are many different types of potato salad around the world, not just the bottled-mayonnaise-laden type you buy at a supermarket appetizing counter that most Americans (I know) grew up eating. Basically, wherever potatoes grow, people will have their version of how to eat them cold as a salad. So, when I set out to create my ideal version of potato salad, I decided to borrow inspiration from a smorgasbord of cuisines.

My original thought was to lighten up the mayonnaise dressing on the salad, and go with a vinaigrette dressing instead. I wanted fresh bright flavors to make it the perfect accompaniment to summer meals. Potatoes can feel heavy on a hot day and I didn't want the dressing to weigh them down any more than necessary. German-style potato salad with the red potatoes and the vinegar-y dressing always sounds appealing, but often fails on flavor for me. I also wanted to keep it vegetarian friendly, so quick tricks to up the flavor, like adding bacon, was something I wanted to avoid.

I had seen a recipe for the Potato Gribiche they serve at Rose Bakery, in Paris, and immediately knew that had to be my inspiration, with the capers and the lemon-y vinaigrette. But, it all came together when I decided that I was going to use classic Scandinavian flavors like dill and whole-grain mustard. If you don't like dill (which is really an under-utilized herb in my opinion), you could substitute flat-leaf parsley. But, you really should give the dill a try.

At this point in my cooking, I'm finally (FINALLY) getting out of my baker-dessert mindset and am starting to feel confident without a recipe. I know the components of a vinaigrette and just winged it with what I had. I made a quick lemon-whole-grain mustard dressing and poured that over the warm boiled potatoes and some chopped shallots, capers and fresh dill. I ended up adding just a spoonful of mayonnaise after tasting it without it. It just seemed to tie the ingredients together and add a familiar creaminess and tang that I love about potato salad. After all, no matter how exciting other cuisines are, a touch of home will always feel right too.

Potato Salad It's great warm or cold, and the leftovers work well the next day.

1 1/2 lbs. small red potatoes, peeled (if you choose) and diced 1 large shallot, minced 1 garlic clove, minced 2 tablespoons, capers, drained and chopped 1 handful of dill, chopped Whole-grain mustard - lemon vinaigrette (recipe below) 1 heaping tablespoon of mayonnaise

Peel and dice potatoes and put into a large pot with enough water to cover. Bring to a boil and cook until fork tender. Be careful to not over cook them, or you'll have mushy potato salad.

While the potatoes are cooking, chop the shallot, garlic, capers and dill. Set aside. In a large bowl make the vinaigrette. Taste and make sure all the seasoning are correct. When potatoes are cooked, drain well and add to the bowl with the dressing and other chopped ingredients. Toss gently to combine. Add the mayonnaise last and gently combine taking care not to mush the potatoes. Chill if not using immediately.

Lemon-mustard Vinaigrette 1/2 cup of extra-virgin olive oil 3 teaspoons of rice wine vinegar 1 heaping teaspoon of whole-grain mustard 1/2 lemon squeezed salt & pepper to taste

Put all ingredients in a bowl and whisk to emulsify.

A cheesy scone for teatime, or anytime

If you like tea and jam, then you probably know about scones. But, if flowery cups and saucers and sweet things are not your cup of tea (sorry) then maybe you're not a fan of them. Scones are a dense, sturdy type of biscuit that make me think of British ladies in funny hats at tea time. Actually, despite their association in my mind, I find scones very versatile and easier to adapt to different meals than say a muffin. There are many different types of scones, depending on where you live. (here's a brief history). The scones we often see in stores in the States are overly sweet. This recipe is a savory version with no sugar at all and works well not just at breakfast, but anytime a cheese infused baked good would be nice. And really, when isn't there such a time?

These savory scones were inspired by an old post by Clotilde of Chocolate & Zucchini. It was one of the first scone recipes I ever tried and it was a huge hit. It incorporates Clotilde's suggestions for how to make your own dried pears, which are easier than you'd imagine. Core a pear and place on a baking rack for 4 hours in a low temperature oven (175 deg F), flipping them half-way through. Just remember to dry them the night before you want to make the scones, and to avoid snacking on them, leaving you none left for baking. I have done it, and if you fall victim yourself, dried apricots finely chopped are a good substitute. I changed the type of cheese from the original recipe and tweaked the measurements a bit for what worked for me. I like using Gruyere cheese because it makes me think of France and French food, which in turn makes me think of Clotilde, who was one of my first introductions into the world of food blogging. I watched her blog grow with a mixture of admiration and jealousy. She made it all sound so lovely, living in Paris and discovering the joys of cooking. She was often my escape as I sat at my desk pretending to do work, reading about what I wanted to cook later that day. Her life seemed like a dream to me, filled with good smells and always something new and delicious to discover. I am glad that food blogging didn't disappear like a passing fad, but entrenched itself into our food culture, where we read and learn about cooking, and find inspiration and community. Food blogs have changed a lot since I started reading them, but the old posts are like old memories. It still thrills me to see my comment on her post from 2006 and remember how elated I was the first time I made this recipe. That's why I had to share it.

I have made these scones for tea parties, weekend brunches, and at times just for my own enjoyment. I generally eat them not in a dainty fashion, but standing over the kitchen counter slathering jam on them warm from the oven. That's really the key point to remember. You should think of these as the embodiment of what's great about home cooking. Your scones can be anything you want them to be, sweet or savory, plain or jazzed up. You do not need a special occasion more than a meal at home as your excuse to make these. Baking scones is all about doing something that makes you happy in your daily life, whenever you can make time, even if it's cheesy.

Cheesy Scones with Dried Pears Adapted from Chocolate & Zucchini. Feel free to substitute your favorite types of hard cheese and dried fruit in this recipe.

1 1/3 cup flour 3/4 teaspoon baking powder pinch of Cayenne pepper 3/4 teaspoon salt 3/4 cup grated Gruyere cheese 1/4 cup chopped dried pears 6 tablespoons cold unsalted butter, cut into small pieces 8 tablespoons cream (heavy, half&half) 1 egg yolk + 1 tablespoon of water, beaten

Preheat the oven to 350 degrees Fahrenheit. Line a baking sheet with parchment paper or a silpat.

Whisk flour through salt in a large bowl until combined. Add butter and rub into dry ingredients until mixture resembles course crumbs. I do this with my hands, working quickly.

Add cheese and pears and mix in with a fork. Add cream and mix gently until dough starts to come together. Add more cream if needed.

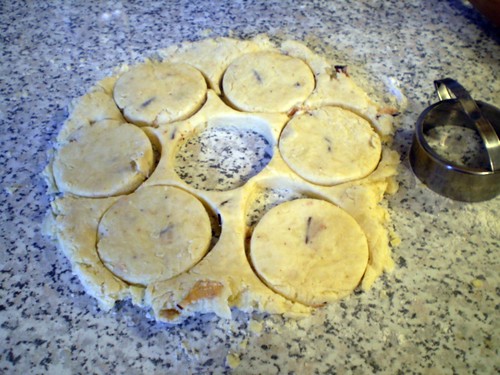
Turn dough out onto floured surface, giving it a gentle knead if it's not completely holding together. Roll out till it's a circle about 3/4 inch thick. If it's flatter that's ok, just means you'll have flatter scones. They're still tasty.

Place scones on baking sheet and brush top with egg mixture. Bake for 20-25 minutes, until puffy and golden. I like to rotate the baking sheet half-way through for even baking. Feel free to add a sprinkling of extra grated cheese on top 10 minutes before they're done.

There is a lot you can learn about love by making pudding

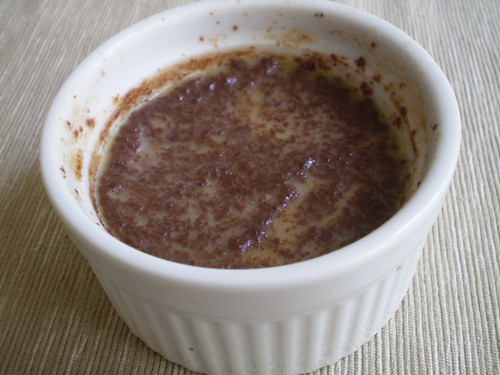
The hopeless romantic in me adores all things associated with Valentine's Day, the chocolates, the flowers, and the forced showing of affection. Actually that last part can't be counted on because as we all learn eventually love is fickle and at times fleeting, what can start out so promising and seem so perfect between two people can end up a complete disaster. This is why we should all be forced to make chocolate pudding before starting to date. I realized the similarities between turbulent relationships and custard as I sat home with the best of intentions making a batch of chocolate pudding the day before Valentine's. Home-made chocolate pudding can be made on the stove top, but there is the custard-based version that needs to bake in a water-bath before cooling. I grew up eating chocolate pudding that was made for me as a special treat. I was allowed to lick the spoon as a consolation prize for having to wait until the little serving bowls chilled. This was the extent of homemade dessert making in my house, and, I loved every minute of it. But, as I learned this Valentine's Day weekend, real pudding is more complicated than a box of My-T-Fine. Making custard, is an undertaking that one must know a little bit about before naively plowing ahead. When treated wrong, there are several things that can ruin a custard as it bakes, resulting not with the velvety smooth pudding of your dreams, but scrambled eggs. chocolate pudding gone wrong I was heartbroken that my pudding, which was as silky as a bowl of melted chocolate when it went into the oven, didn't have a happy ending. I searched frantically to try and find an explanation as to what went wrong. I sat down and stared in disbelief at the curdled mess in the ramekins. I tried to stir them and make them smooth again, but what's done is done. Then I realized (it being Valentine's Eve and all), that my shock at how this didn't go as expected reminded me of certain past relationships. Sometimes you can't just smooth things over. This is a lesson that all girls and boys should learn about love, because getting over a failed custard is a lot easier than a getting over a broken heart. Just the knowledge that pudding made with the best of intentions can morph into something utterly unattractive if things don't go as planned, might remind one to proceed with some caution in matters of the heart, as well as the oven. (I did finally figure it out what caused the disaster when a friend pointed me to Harold McGee's chapter on custard in On Food and Cooking -  now I know for next time, and have adapted the recipe to include the fix).

I say all this not to scare people off from making chocolate pudding (or falling in love). When done right, it's worth the extra effort (and infinitely better than some second-rate option that comes in a little plastic container). Like love, if it works it should feel comfortable, and something that is so pleasurable you're content to sit at home enjoying it, rather than the kind of dessert that needs to be dressed up with fancy swirls of decorative coulis to make you think it's worth your time. No matter how your chocolate pudding turns out, at least you'll have tried. And if it turns out you fail, you'll know more for next time. And, of course, there's always more pudding in the sea.

Chocolate Pudding Adapted from the Recipes from Home Cookbook, by David Page and Barbara Shinn. Do not tightly cover your baking dish with the ramekins or the temperature of the water bath will rise too high and the steam trapped inside the dish will cook the eggs too quickly causing them to curdle.

2 cups heavy cream 2.5-3 ounces best quality bittersweet chocolate (finely chopped) 3 large egg yolks 1/4 cup sugar 1/2 teaspoon vanilla Pinch of salt

Preheat the oven to 325 degrees Fahrenheit. Set out 4 ramekins and a deep baking dish large enough to hold them and a water-bath.

Bring the heavy cream to a simmer in a saucepan and then remove from the heat. Place the chopped chocolate in a stainless steel bowl and pour half of the cream over the chocolate. Let stand until melted. Stir until mixture is completely smooth and then add the other half of the cream.

Whisk egg yolks, sugar, vanilla and salt in a separate bowl. Gradually whisk in the melted chocolate mixture. Strain the pudding through a fine-mesh strainer and skim off froth on the top.

Pour the pudding into 4 small ovenproof (about 6 oz) ramekins. Place them in a deep baking pan and put pan in the oven. Add enough hot water to the pan to reach halfway up the sides of the ramekins. Cover loosely, with tin foil. Make sure there is room for air to escape and ensure that the pan does not trap the steam. Bake for about 50 minutes, or until puddings look set around the edges, but not quite in the center. Give them a shake to tell.

Remove ramekins from the water bath and let cool to room temperature before placing in the refrigerator to cool completely.

Beating the winter doldrums with chili spiked whipped root vegetables

February produce in a four-season climate leaves much to be desired. Chances are most of you don't associate joy with the word turnips. Does the thought of parsnips make you wonder if you can live on pasta alone till spring? If the avocados and tomatoes in your supermarket from far away have you thinking about cheating on your attempts to eat more seasonally consider this -chili spiked whipped root vegetables. I promise they're as creamy and comforting as a bowl of regular mashed potatoes, and with a little extra spice they're just the thing to help you get excited about what little we have to work with this time of year.

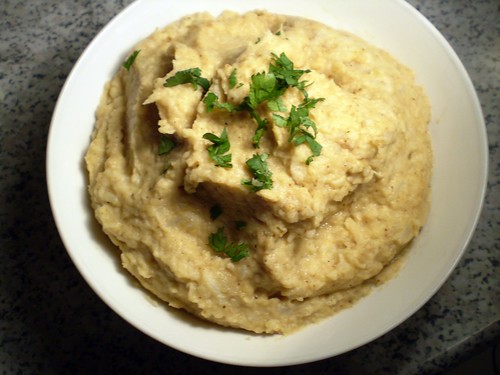
This dish is made up of a mixture of parsnips, turnips and a potato or two. It could easily be adapted to whatever root vegetables you prefer. If you have never considered cooking a parsnip or a turnip, let this be your gateway dish. After all, when you add butter and sour cream to a vegetable it becomes much more enticing to most skeptics. The chili powder is an idea I borrowed from a mashed potato recipe in the The San Francisco Chronicle cookbook. The recipe suggested the chili was supposed to "chase away the blues" and I figured given my less than cheery disposition (and most people I came across) this past Monday, it was worth a shot. What resulted was a buttery, slightly sweet, red-hued dish that should wake you up from your winter doldrums and make your diners take notice. The spice is gentle enough that this is definitely still comfort food. Turnips and parsnips are slightly lighter than plain old potatoes, and if you take the time to whip them they will produce an almost fluffy puree. (I was able to get a consistency I was content with using a hand-held mixer. If you were serving this for company and were aiming for a perfect puree it might help to pull out the heavier equipment, the stand-mixer or a food processor). The start of Spring is only a month and a half away, but while we still have to brave the cold for a little while longer, do what you need to to keep your spirits up, especially if it involves a whole lot of butter and chili powder.

Chili-Spiked-Whipped-Root-Vegetables Recipe influenced and adapted from two different sources - the James Beard Foundation website and The San Francisco Chronicle Cookbook.

3 medium parsnips, peeled and diced 1 large baking potato, peeled and diced 2 to 3 medium turnips, peeled and diced 1/4-1/2 cup sour cream, or to taste 6 Tablespoons butter, softened 1 Tablespoon chili powder, or more to taste Coarse salt and white pepper to taste Chopped cilantro for garnish

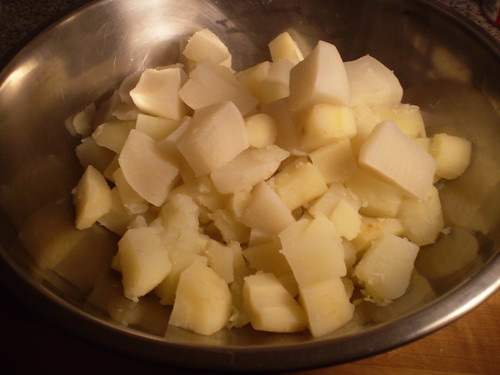
Place the vegetables in a pot with enough salted water to cover. Bring to a boil and cook until the vegetables are very tender, about 30 to 40 minutes. Drain well.

Place the cooked vegetables in a bowl and whip until mashed (this can be done with a hand-mixer or in a stand mixer). Slowly incorporate the remaining ingredients, then whip at high speed for about one minute to lighten the mixture.

Stir in the chili powder and salt and pepper. Taste, and adjust seasons accordingly. Garnish with cilantro before serving.