Food Bloggers Against Hunger

2013-04-07 19.31.59

The minute I saw Nicole's tweet about TheGivingTable's campaign to get food bloggers to raise awareness for hunger in America, I signed up.  I'm well aware that our food laws essentially work against the goal of keeping healthy food affordable. I first read about it in The Omnivore's Dilemna when Michael Pollan explained it in detail. When the movie Food, Inc. was released, I went to a screening and sat there frozen to my seat in disbelief about how many, many things, in our food system seemed to defy logic. The biggest barrier to access to healthy food is the cost. Government subsidies do not go towards fruit and vegetable producers, but to producers of corn, wheat, and other ingredients that are staples in processed foods. That is why a McDonald's cheeseburger is cheaper than a head of broccoli. That is why, if you rely on food stamps (thee SNAP Program) to feed yourself or your family, you are hard pressed to afford to eat unprocessed foods all of the time. This problem is the focus of a new documentary by Participant Media—the same studio that made Food Inc.—  the film follows three families struggling with food insecurity, and sheds light on hunger in America.

I think the easiest way to eat healthy, and not spend a fortune is to cook at home. That's in part because I've learned how to cook, and possibly because I have no real memory of living on food stamps as a kid, though I did, briefly. I've never had to worry I'd go hungry, and nobody in this country should either. Although, living in NYC makes it hard to plan to eat home (or stick to a budget) all the time, I think it's a good idea to cook something big at least once a week, leaving you leftovers that can be repurposed for another meal or two. I'd do it even if I didn't like to stay home and cook in my free time.

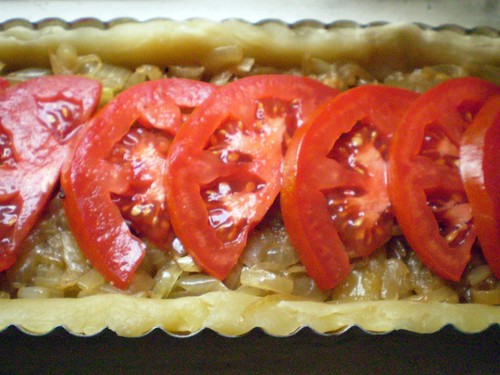
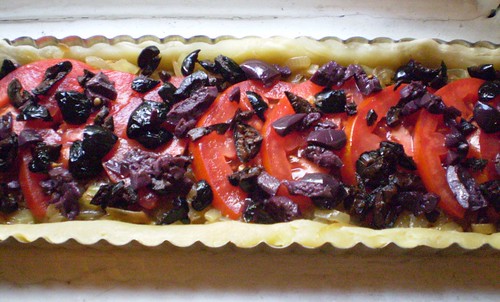
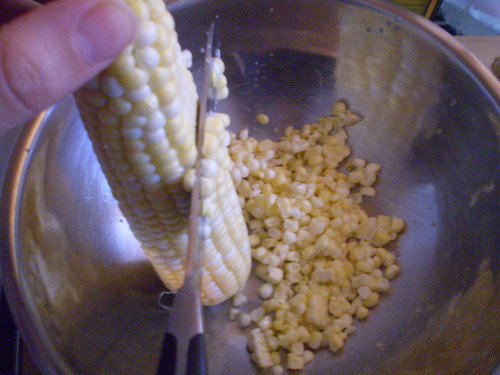
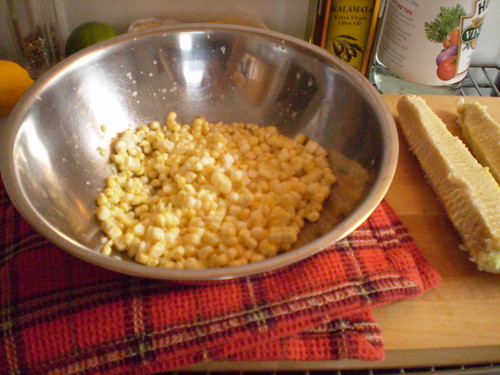
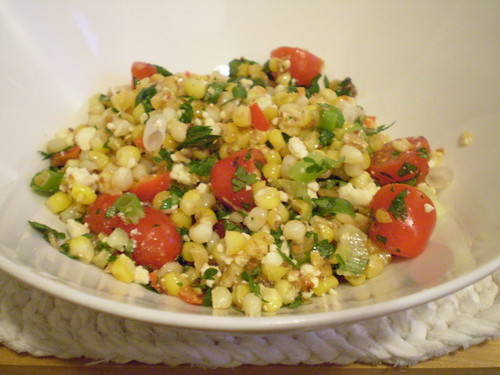
There are tons of resources online to finding budget-friendly meal ideas. And, I'd be amiss if I didn't give a shout-out to Cathy Erway's blog, Not Eating Out in NY, as a resource for recipes and the cost-breakdown of how much it costs per person to make each dish, which will blow your mind, especially if you're used to buying your meals out. This Sunday, I set out to make something that would be cost-conscious and healthy, and last for another meal since I wasn't feeding the proverbial family of four - in my case it's often neighbors and one demanding Chihuahua. I made a Spanakopita, aka Spinach Pie, because it's one of my favorite comfort foods that includes vegetables. It keeps for a couple of days, and all the ingredients are available in any grocery store. I lowered the feta amount, because feta isn't that affordable, and mixed in ricotta which stretches further for your dollar. Plus the leftover ricotta can be used in another dish (Lemon-Ricotta pancakes is what I might do with it). Lastly, the basic recipe, for a baked "pie" wrapped in phyllo dough can be stuffed with so many things - leftover shredded chicken, or other veggies. I hope this post will accomplish three things: 1) Get you to sign the Share Our Strength Petition to support anti-hunger laws; 2) encourage you to cook something at home; and 3) realize that not all food bloggers eat fresh pasta with truffles and artisinal ice cream all of the time. Well, in truth, this blogger might be eating fancy ice cream, but I'm still working on that budget thing.


Spinach Pie - filling
Spinach Pie squared

A Place at the Table premiered on March 1st, 2013.  You should watch A Place at the Table, to better understand the problem, and why we need to push for legislation that will subsidize the things we should be eating, not those that we shouldn't, so that everyone can have access to healthy food. It's available for download at any of these sites:

Amazon: http://amzn.to/ZVvEPk OnDemand: http://on.fb.me/XbxtaC Google Play: http://bit.ly/10XSwAG iTunes: http://bit.ly/APATTiTunes

SNAP—the nation’s food stamp program—is at risk for severe cuts that would impact millions of families, especially children, that rely on school meals and food stamps to survive. In response to the film, the country's leading anti-hunger organizations, Share Our Strength, Bread for the World, Feeding America, and The Food and Research Action Center, are asking supporters to help spread the word.

Private sector programs and charities aren’t enough. The only sustainable solution is for government policies to change, so we must make our voices heard.

Please take a moment today to tell Congress to support anti-hunger legislation by signing this petition that the folks at Share Our Strength are introducing to protect Federal Nutrition programs for kids.

Spanakopita                                                                                                                                                       

Adapted From Modern Greek, By Andy Harris
  • 1 package phyllo dough, defrosted 
  • Olive oil or melted butter 
  • Filling:  2lbs. fresh spinach (frozen could work too) 
  • 8 green onions (or 2 small yellow onions) 
  • 1 glove of garlic minced 
  • 1 tablespoon of olive oil 
  • Dill, or a mix of dill and parsley 
  • 1 package of feta cheese (mine was 7 oz) 
  • 1/2 cup ricotta cheese 
  • 2 eggs, beaten
  • 1/2 teaspoon salt 
  • 1/2 teaspoon nutmeg (optional)

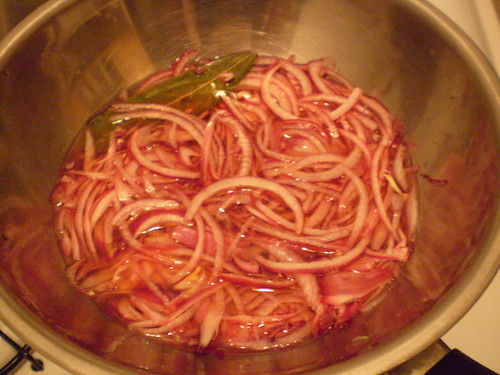
Prep the filling: Wash the spinach, and blanch in boiling water for 20-30 seconds until it slightly wilts. Immediately rinse with cold water to stop the cooking, and leave in a colander to drain well.

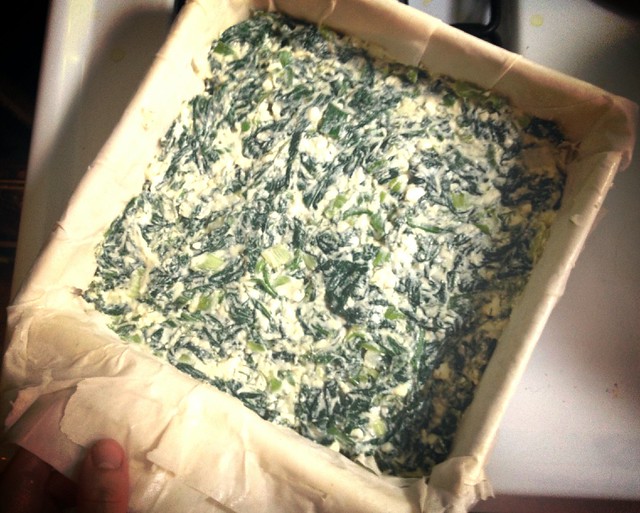
Chop the onions and garlic and sauté in tablespoon of olive oil until a starting to soften, about 3-4 minutes. Combine in a bowl with chopped herbs, eggs, cheeses and seasoning. Squeeze any remaining water in the spinach out before adding to the bowl. Mix all to combine.

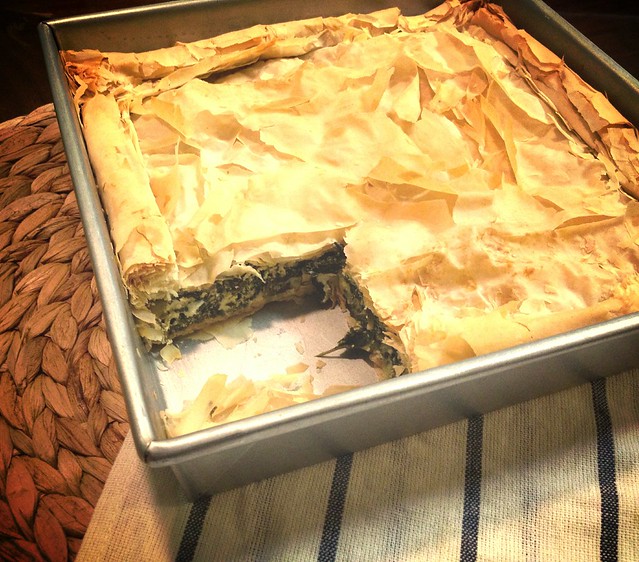
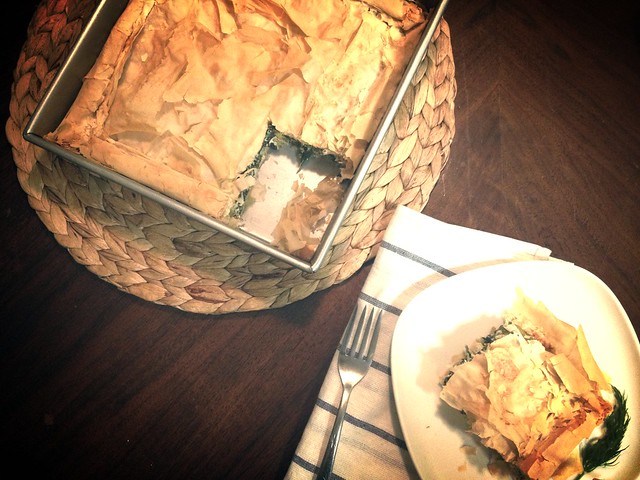
Assemble the pie: Preheat the oven to 350 degrees Fahrenheit. Prepare the phyllo dough according to the package (normally bringing it to room temperature, and keeping it covered with a damp towel while you work). Take any deep pan you want to use (I used a square 9 inch, but you can use anything as long as it has sides), and start to layer the phyllo dough in the bottom. Cut the phyllo a little bigger than the size of your pan, if you want to fold it over the top, otherwise cut to size (I use the overhang method so the filling doesn't escape). Brush the bottom of the pan with a small bit of olive oil, and continue to brush each layer with a little olive oil to coat. If you use too much it'll be greasy. Be really gentle, the dough tears easily. If it tears, just layer another scrap over it. Do about 6-8 sheets for the bottom layer.

Pour the filling in, and spread evenly around the pan. Repeat the layers for the top, and fold over any that you had from the bottom layer. Sprinkle water on the top to prevent burning, or brush with milk. Bake for 40-45 minutes or until golden. Let cool before cutting.

Chickpea Salad - Picnic posts

Chickpea Salad

It's officially summer. Summer makes me think of picnic-ing in the park, reading a book by the beach and running after the ice cream truck when I was a kid. That's my idealized summer. In reality, summer for most of us still means going to work even if it's gorgeous out, and squeezing in some outdoor time during the week. I love the concept of picnics but the closest I've come to one this year, was last week when I bought a taco from the Endless Summer truck and ate it sitting down by the parking lot around the corner. That's why I'm going to do a series of posts this summer on perfect picnic food. Hopefully to encourage you, and me, to plan some meals in the great outdoors, or at least near a tree. I made this little salad one night when it was too humid to think about using the stove and I had a lot of leftovers from the mixed greens salad I made for dinner. I threw this together thinking it would benefit from a night in the fridge and I'd have another lunch (or dinner) without cooking. It worked. I decided to make this my first post in the picnic series, because even though it's not novel, it's easy and hearty, no need to cook pasta or another grain. It's the type of salad that you can and should dress the night before. It's an all-in-one package picnic food, no need for separate bottles of salad dressing or a knife. Unless you're the type that has a wicker basket, and a wine glass holder for the grass (I've seen this in person), unfussy food is the only food you should picnic with. And, if you are that person, here's hoping the cops arrest you for so unabashedly drinking in the park.

Chickpea Salad

Make this the night before or at least a couple of hours for the flavors to combine.
  • 1 can of chickpeas
  • 1/2 of a large red bell pepper, diced
  • 1/2 of a red onion, diced fine
  • 1 garlic clove, minced
  • Large handful of cilantro or parsley, chopped
  • 3 tablespoons red wine vinegar
  • 1/2-1 teaspoon cumin (or to taste)
  • Drizzle of honey
  • 1/2 cup extra-virgin olive oil
  • Salt and Pepper to taste
  • Juice of 1/2 lime before serving

Rinse the chickpeas well and place in a large bowl. Set aside. Meanwhile boil 1 cup of water. Place chopped onion and garlic in a small bowl and pour the boiling water over them. Let sit for 1 minute to mellow out the raw onion, garlic taste. Strain.

Combine chickpeas with the chopped red pepper, onion, garlic, and cilantro. Next make the vinaigrette by combining the vinegar, cumin and honey in a bowl. Whisk as you pour in the olive oil to emulsify. Add salt and pepper to taste. Pour over the salad and toss well. Taste again to see if it needs more salt. Before serving, squeeze half a lime over it to brighten the flavors a bit.

Sunchokes and a twist on patate pizza

At the Union Square greenmarket late on a Saturday, I stopped at the Paffenroth Gardens stand looking for some butternut squash. Two of the women working at the farm stand table were discussing the miracle-like qualities of sunchokes, aka Jerusalem artichokes, to cure diabetes. I stood there long enough to pretend to be examining the produce left on the table to overhear claims of how eating these little knobby tubers regulated a woman's blood sugar levels. I was intrigued. Maybe I should be eating these? Why aren't I eating these? I grabbed a green net pint box and started filling it up with these unimpressive looking veggies. I quickly checked with the above mentioned sales lady, "I cook these just like a potato?", I asked. "Yep," "However you like your potatoes, you'll like these. Roast them, or mash them." I threw them in my bag and off I went feeling brave and adventurous, completely forgetting about the obligatory butternut squash. 

I went home and all my plans of roasted sunchokes went out the window when the memory of Jim Lahey's Patate Pizzathat you can get at the Sullivan Street Bakery suddenly came to mind. And that's all I could think about. Forget roasting and mashing, I needed to know if the supposed delicate flavor of the sunchokes could star in their own version of a pizza. Lahey's potato pizza is the stuff of my dreams. Bread and potatoes and cheese being high up there on my list of foods that make me happy. I'm a simple girl, really. If you have never been to the Sullivan Street Bakery, you need to go. If your scared of carbs, I can only suggest you stop living in the past, and start embracing the staff of life. I used the dough I already had in my refrigerator for the pizza dough. It was a whole wheat dough from Artisan Bread in 5 Minutes a Day that I keep in there to make batches of bread, but it also works in a pinch for pizza, as long as you're down with whole wheat pizza. That's where my "healthy" pizza attempts max out. I'll admit I could use a little work on the shaping of the crust. For the record, I was attempting a nice rectangle shape. At this point I was sort of winging it after consulting a few non-tomato sauce pizza recipes. I flavored the sunchokes much in the same way I would have had I roasted them - sauteing them in a pan with a little olive oil, some sliced garlic, fresh rosemary and salt and pepper. I sliced them on a mandolin first to ensure they'd be paper thin and pretty looking. For full disclosure, I should tell you that in addition to the amazing healthy properties sunchokes can have on your body, I have also read a lot about them being hard to digest, and causing some embarrasing gastro issues. I didn't notice any problems, but I did take the time to peel them first, since some sources suggested the culprit was in the skin. For a better discussion of the effects, see the very scientific and very opinionated comments on this post. If I was the type of person to have cocktail get-togethers in my fabulous loft, I would consider serving this in slices. However, I am definitely the type of person that pushes the limits on how much sugar she consumes, so I will consider eating more insulin- regulating-vegetables that can be served in the form of pizza. And, so should you.

Sunchoke Pizza Use a fresh store-bought dough, or your favorite pizza dough recipe. If you are an Artisan Bread in 5-Minutes a Day convert, use any of the recipes they suggest for Pizza dough.

1 pint of sunchokes, sliced on a mandolin (peeling is optional) 2-3 garlic cloves 3 sprigs fresh rosemary, or to taste 1-2 tablespoons olive oil 3/4 cup freshly grated Parmesan or Pecorino cheese

Scrub clean the sunchokes and slice them on a mandolin, or in even slices about 1/8 inch thin. Slice garlic cloves.

Heat olive oil in a saute pan until hot, add the sunchokes and garlic and rosemary and cook until the sunchokes taste almost completely cooked, meaning not totally mushy soft, but wilted. Keep an eye on it to not burn the garlic. Season to taste with salt and pepper.

Roll out your pizza crust. Brush with olive oil. Top with sunchokes, overlapping them as you fill the pizza surface. Leave an inch around the edges for the crust. Sprinkle the top with cheese.

Let cool slightly, slice and enjoy.

Bake at 450 degrees Fahrenheit on a pizza stone for about 10 minutes or until the crust appears done and cheese is melted.

What I do with apples besides baking with them...Waldorf Salad

waldorf saladI recently took a ride about an hour and half north of NYC, through bright fall foliage, to Warwick to go apple picking with my family. Masker Orchards, is a pick your own orchard is a huge orchard that's very kid friendly (think petting farm, pony rides and very short trees). Too bad the only kid with us, was sleeping. That didn't stop me from filling up my bag with Jonagolds, Ida Reds, McIntosh, and various others. As I picked, I had visions of apple strudels and apple tarte tatins in my head. I even thought about trying to make apple butter when I got back to Brooklyn. But instead, after too much obsessing over the end of Mad Men, and how to dress as Joan for Halloween, an old retro-classic popped into my head, Waldorf Salad.

I have always been intrigued by the name of this salad, but I do not recall ever eating it. It was the kind of thing I saw in the yellowing pages of my grandmother's cookbooks, and frankly something I thought was the epitome of dated cuisine. Still, to me (and my overactive imagination) the name alone, evoked images of days long gone and ladies who lunched (I hear those ladies still exist somewhere) and lettuce leaves filled with salads with fussy names served on fine china.

But, to my surprise, I found a little version from the classic vegetarian cookbook, The Moosewood Cookbook, by Mollie Katzen that made me think this simple salad with the fancy name might actually be tastier than I had assumed. I consulted my trusty Fanny Farmer, just to see if a more original version of the recipe differed much. It didn't, with the exception of blue cheese. My thought process went something like this, "Blue cheese? Apples? Sold!"

This salad is a breeze to put together once you chop up the few ingredients, mix the dressing and then toss together. Cooking 101, except these flavors mixed together are nothing to brush off as simplistic, or dated. I want to bring it back. Give it a try, serve it for lunch, serve it as a snack, or part of an appetizer spread, just don't serve it in a lettuce cup, and I think you'll see that this salad should come back into fashion. apples + blue cheese salad

Waldorf Salad Adapted from The Moosewood Cookbook.

3 apples, tart ones are best 2 stalks celery, chopped 2 green onions or scallions, chopped 1/2 cup walnuts, toasted and chopped juice of one lemon 1/2 cup plain yogurt (I used Greek yogurt) 1/2 cup mayonnaise 1/3 cup crumbled blue cheese (I used Gorgonzola) 1 tablespoon honey (optional)

Chop apples, celery and scallions. Toast the walnuts. Mix together.

Crumble the blue cheese, or break it up using the back of your fork. Mix with yogurt, mayonnaise, and honey.

Toss salad ingredients with dressing. Feel free to add more apples or even pears if the dressing to salad ratio is too heavy.

Pissaladière-inspired tomato tart

P9190430.JPGSummer is officially over, but a few juicy red tomatoes who don't want the party to end can still be found hanging about the greenmarket. This is the perfect time to bake something with them now that temperatures have cooled off a bit. That's why my recent attempt at making a pissaladière one Sunday afternoon started looking more like a tomato tart. They were simply stealing the show. Just because the calendar says the season has officially changed, does not mean that everything on our plates has to instantly turn over as well. I actually hate when people rush the seasons. Christmas decorations in the drugstore for sale right after Halloween are just as silly to me as being served pumpkin soup on a balmy 84 degree day in September. That's why I suggest you ease into the season, even if you're as excited for Fall as I am. Make sure you search the market for any last summer produce, cause you should use what's left of it while you still can. Last weekend, in an effort to think of a fun football watching snack, I decided I was going to try to make a pissaladière, which is a type of "pizza" from the South of France (actually I think that without cheese or tomatoes calling it a pizza is a stretch). Pissaladière sometimes is made into a tart shell  and I had prepped the shell about a month ago for such a purpose and left it in my freezer. I took the shell out of the freezer and blind-baked it while I prepared the filling. The recipe I was following was from the Rose Bakery cookbook that had a modern take on the dish. However, just to compare, I pulled out a Cook's Illustrated magazine a friend had given me with a recipe for pissaladière, done the more traditional way, on a pizza-type of dough, free-formed and with anchovies, not tomatoes. I was really tempted to go traditional, but I figured I had all winter to make one that way. I found gorgeous tomatoes at the market on Saturday, and ate a good portion of them with nothing more than a sprinkle of sea salt, while the juices dripped down my hand. The rest were destined for this dish.

The filling is pretty simple to assemble once you cook the onions down until they are caramelized and jammy. That takes about 30 minutes, meanwhile pitt and chop some olives and slice your tomatoes. I actually took some hints from the Cook's Illustrated on cooking the onions, figuring someone probably got paid to figure out the nuances of the best method of cooking them down, and I loved the addition of brown sugar. After all was said and done, and the tart was filled and baked, it was an exciting flavor combination with the sweet onions, the briny olives and the bright flavors of the tomatoes. It was a beautiful presentation too, perfect for a side dish at a Sunday dinner perhaps, or an ideal lunch. For football, maybe I should have gone with the pizza-dough method, rather than the tart, because football food should be finger-food, even if it is French inspired. picnikfile_nVR_iH

Pissaladière Tomato Tart Adapted from Rose Bakery and Cook's Illustrated. If you don't feel like making a shortcrust tart dough, try the filling on a pizza dough stretched into a long rectangle and adjust baking times.

1 blind baked tart shell (use any shortcrust pastry dough you prefer) 3 tablespoons olive oil 2 lbs. yellow onions, sliced about 1/4 inch thick 1 garlic clove smashed (not chopped or it will burn) 1/2 teaspoon of salt 1 teaspoon brown sugar pinch of ground cinnamon (optional, but adds something interesting) 1 tablespoon water 1 handful olives, pitted and chopped (black olives are traditional, but I used a mixture) 2 tomatoes, sliced few sprigs of fresh thyme

Prepare tart shell, if using by blind baking while you prepare filling.

Slice the onions, and heat olive oil in a large saute pan until hot, but not smoking. Add onions, garlic, salt, brown sugar and cook on med-high heat for about 10 minutes, stirring often. They will look wilted at that point and be starting to brown. Reduce heat to low and cook, until onions are jammy and golden brown, about 20 minutes longer. Take off heat and add the cinnamon and water and stir til incorporated.

While onions are cooking chop and pitt olives, slice tomatoes, and pull prep thyme. (Stretch the pizza dough on a sheet pan, if you're using that instead of tart shell.)

Fill tart shell or cover pizza dough with onions once they're cooked. Lay the tomato slices in on top and sprinkle the whole thing with the thyme leaves and the chopped olives.

Bake the tart at 350 degrees Fahrenheit for about 20 minutes, or until tomatoes look wilted a bit. If using pizza dough, bake until crust is cooked.

A refreshing potato salad for hot summer days

There are many different types of potato salad around the world, not just the bottled-mayonnaise-laden type you buy at a supermarket appetizing counter that most Americans (I know) grew up eating. Basically, wherever potatoes grow, people will have their version of how to eat them cold as a salad. So, when I set out to create my ideal version of potato salad, I decided to borrow inspiration from a smorgasbord of cuisines.

My original thought was to lighten up the mayonnaise dressing on the salad, and go with a vinaigrette dressing instead. I wanted fresh bright flavors to make it the perfect accompaniment to summer meals. Potatoes can feel heavy on a hot day and I didn't want the dressing to weigh them down any more than necessary. German-style potato salad with the red potatoes and the vinegar-y dressing always sounds appealing, but often fails on flavor for me. I also wanted to keep it vegetarian friendly, so quick tricks to up the flavor, like adding bacon, was something I wanted to avoid.

I had seen a recipe for the Potato Gribiche they serve at Rose Bakery, in Paris, and immediately knew that had to be my inspiration, with the capers and the lemon-y vinaigrette. But, it all came together when I decided that I was going to use classic Scandinavian flavors like dill and whole-grain mustard. If you don't like dill (which is really an under-utilized herb in my opinion), you could substitute flat-leaf parsley. But, you really should give the dill a try.

At this point in my cooking, I'm finally (FINALLY) getting out of my baker-dessert mindset and am starting to feel confident without a recipe. I know the components of a vinaigrette and just winged it with what I had. I made a quick lemon-whole-grain mustard dressing and poured that over the warm boiled potatoes and some chopped shallots, capers and fresh dill. I ended up adding just a spoonful of mayonnaise after tasting it without it. It just seemed to tie the ingredients together and add a familiar creaminess and tang that I love about potato salad. After all, no matter how exciting other cuisines are, a touch of home will always feel right too.

Potato Salad It's great warm or cold, and the leftovers work well the next day.

1 1/2 lbs. small red potatoes, peeled (if you choose) and diced 1 large shallot, minced 1 garlic clove, minced 2 tablespoons, capers, drained and chopped 1 handful of dill, chopped Whole-grain mustard - lemon vinaigrette (recipe below) 1 heaping tablespoon of mayonnaise

Peel and dice potatoes and put into a large pot with enough water to cover. Bring to a boil and cook until fork tender. Be careful to not over cook them, or you'll have mushy potato salad.

While the potatoes are cooking, chop the shallot, garlic, capers and dill. Set aside. In a large bowl make the vinaigrette. Taste and make sure all the seasoning are correct. When potatoes are cooked, drain well and add to the bowl with the dressing and other chopped ingredients. Toss gently to combine. Add the mayonnaise last and gently combine taking care not to mush the potatoes. Chill if not using immediately.

Lemon-mustard Vinaigrette 1/2 cup of extra-virgin olive oil 3 teaspoons of rice wine vinegar 1 heaping teaspoon of whole-grain mustard 1/2 lemon squeezed salt & pepper to taste

Put all ingredients in a bowl and whisk to emulsify.

Carrot coins in cilantro salsa

It's springtime and one of the things you can find at green-markets around looking lovely are big bunches of carrots. Maybe it's just me, but I feel like because carrots aren't trendy and tend to stick around longer than some other seasonal favorites, they often get overlooked for things like ramps. It's like baby got stuck in the corner, and it's not right. Sure, carrots are good for you and a workhorse for stocks, stews, and most slow winter cooking. But, the slender bright orange bunches of carrots you can find in the market now deserve to be the stars of a dish all their own.

Carrot salads are a good start, but I find briefly cooking carrots really brings out their sweetness. The truth is, I don't really love raw carrots, and would choose a celery stick over a carrot stick any day. Sure cooked carrots are tasty slathered in butter, like most things, but I wanted something a little lighter than that. When I was little, my grandma always used to make us take notice if she put together a dinner plate with lots of different colors on it. Little did she know, her choice of different colored foods was actually a good way to measure how healthy dinner was that night. (Although from high school through college mac and cheese from the box was my orange colored food of choice). Orange foods are high in beta-carotene and vitamins A and C. Paying attention to the color of your foods is actually an easy way to make sure you're eating a well-balanced meal. Click here for more examples. I've been paying attention to different ways to prepare carrots to find more ways that would appeal to me, anything but that dreaded bag of mini carrot sticks that I can't seem to escape. Has every woman in the U.S. been brainwashed into thinking the only way to stay thin is to eat nothing but mini-carrots?! Ugh.

I first made this cilantro salsa a few nights ago for some pork tacos that I was making. I was excited that it needed exactly the herbs I had growing in my windowboxes . This sauce is incredible. It would be perfect over any grilled meat or fish, and just the smell of it made me think that I would win over a lot of people if I served it that way. I immediately thought about all the things I envisioned myself doing with this sauce throughout the summer. Then I saw these carrots in the back of my fridge yesterday and I thought this sauce was so good I bet slathering carrots in it would work. I started by slicing the carrots very thin, thinking they'd taste even sweeter the thinner they were. I knew I didn't want to try grating them because grated carrot salads sometimes seem too weighted down with dressing for me, and a grated carrot salad is never as crunchy as a slaw. But these little coins retained their bite even after a brief dip in boiling water. I can't take credit for the pairing, because that is all Debra Madison's genius. I can only take credit for the fact that you now have no excuse to ignore the carrots at the market the next time you see them.

Carrot Coins in Cilantro Salsa Adapted from Debra Madison's Vegetarian Cooking for Everyone. This salsa is completely addictive and you'll find yourself wanting to put it on everything. If you like capers they'd be great tossed in here as well.

Peel and slice 1lb. of carrots (or less depending on how many your feeding) into paper thin coins. The thinner they are the faster they'll cook. Toss in a pot of salted boiling water for about 5-10 minutes, or until fork tender. Remove and rinse in cold water to stop the cooking. Drain and toss with the cilantro salsa . Serve warm or chilled.

Cilantro Salsa 1 jalapeño chile, seeded 1 bunch of cilantro 1/2 cup fresh mint leaves 1-2 garlic cloves 1/2 cup olive oil 1/4 cup water Juice of 1 lime 1/2 teaspoon ground coriander Salt & pepper to taste

Chop all the herbs and garlic very finely. Mix in lime juice, water and oil. Then stir in spice and season to taste.

Raiding-the-Cabinets-Roasted-Chickpeas

P1170074It is bitterly cold in Brooklyn this weekend. There is not even the promise of snow that could help me forget about how miserable this weather can be. The windchill is in the single digits and going outside seems like a very bad idea. I find myself stuck indoors, unprepared to face a weekend with only what I have in the cabinets. I opened, and re-opened the cabinet, hoping for something exciting I didn't notice the first five times I looked. Finally, I decided to reach towards the back and grab a can that had been in there for quite some time.  Canned chickpeas. No, I didn't want hummus. And, no making a salad wasn't an option, given the absence of anything green in my refrigerator. I decided today was the day to try making roasted chickpeas. Turns out, although it's not a quick fix for a snack, it is a versatile, economical, relatively healthy, easy option to know about when your best bet for something to snack on has to come out of a can.  P1170095 The recipe I used combined two different recipes for a Moroccan spice-mix version, to which I added a few adaptions of my own. It bears mentioning that a recipe for roasted chickpeas is like a game of telephone, each time the information is passed on, it changes a bit. I say this because I've come across tons of variations on how to flavor the little buggers as well as how hot your oven should be and how long to cook them. In fact, while I was prepping the chickpeas for the oven, and loudly cursing my crappy can-opener, my friend (who I was on the phone with) consulted her recipe for this dish and read me yet another very different interpretation of how to roast chickpeas.

That said, I think where this snack gets interesting is in how you choose to flavor the chickpeas. I liked the Moroccan spice mix just fine.  It did make my apartment smell like a shawarma restaurant, but it was an powerful flavor. I think these would also make a great Superbowl snack, flavored with some Creole seasoning as a nod to New Orleans, perhaps. Either way it was fun to make this little snack, and made me feel good about using what was already in my kitchen. I'm including a few different flavor options, depending on what's within your reach that day.

Roasted Chickpeas For flavor options, including the Moroccan Spice Mix I used, see below. Recipe adapted from Kalyn'sKitchen.com

2 can chickpeas, preferably organic 2T olive oil 1/2 teaspoon - 1 teaspoon spice mixture of your choice (go lighter on stronger flavors) salt to taste

Preheat oven to 400 F. Drain chickpeas into a colander and rinse well with cold water until no more foam appears. Let beans drain for 5-10 minutes, then pat dry (crucial step to avoid mushy chickpeas) and rub off any of the translucent skins that may be falling off.

When beans are well drained and dried, toss with olive oil, spice mix of your choice, and salt. Arrange in single layer on large baking sheet. Roast 40-50 minutes, or until they are slightly browned and make a rattling sound when you shake the baking sheet and appear crunchy enough for you. Testing one is your best bet. Serve warm or let cool.

Moroccan Spice Mix 1 3/4 tsp. ground cumin 1 tsp. ground coriander 1/2 tsp. chile powder 1/2 tsp. sweet paprika 1/2 tsp. ground cinnamon 1/4 tsp. ground allspice 1/4 tsp. ground ginger 1/8 tsp. cayenne pepper

Creole Spice Mix 2 tablespoons paprika 1 tablespoons salt (I lowered this because of salt in the original recipe) 2 tablespoons garlic powder 1 tablespoon freshly ground black pepper 1 tablespoon onion powder 1 tablespoon cayenne 1 tablespoon dried oregano 1 tablespoon dried thyme

Other Ideas Spicy version - add 2 teaspooms of chili powder + a few dashes of hot sauce. Salt &Vinegar - toss roasted chickpeas cider vinegar and sea salt to taste. Indian inspired version - add 2 teaspoons of garam masala.

Roasted Chickpeas With A Creole Spice Mix on Foodista

First-Night-Carciofi-alla-Judea

PC100148.JPGHanukkah may have some traditional foods, potato latkes (aka potato pancakes) and sufganiyot (aka jelly doughnuts), but in general the rule is anything fried goes. So, while shopping for potatoes to make latkes, I changed my plans when I saw these striking artichokes in the market. I had to have them. They were beautiful and festive, perfect for a holiday meal. Next, I set out to think about what I could do with artichokes for the first night of Hanukkah. I recalled reading about a fried artichoke preparation that originated in the Jewish ghetto of Rome, simply called Carciofi alla Judea (for more about the history of this dish click here). I have never had one of these prepared for me, but I thought, "how could anything fried taste bad?" Unfortunately, there was nothing miraculous about this meal, except for the amount of olive oil I wasted. PC110153.JPG I jumped on this idea, lured by images of lightly browned, crunchy, earthy artichoke petals that would impress you and inspire you to put down the potatoes and fry something different. I didn't do my research. If I had I would have seen that this dish is best prepared with baby artichokes, for their more tender leaves. I might also have realized that frying them whole was an option, as used in some other versions of this recipe. PC110159.JPG The recipe that I found and put my faith in (it was on a great Jewish blog after all) called for peeling off the tough outer leaves and slicing the artichoke in half before you start on the two-step process of cooking them in a mixture of olive oil and water until softened (see the photo above), and then frying them until crispy. PC110167.JPG My artichokes looked like fried goodness, glistening as they came out of the olive oil. After a sprinkle of some fleur de sel salt and a squeeze of lemon I could barely wait to grab a piece. I started with the outer leaves that looked more well-done, hoping that it would taste like a crispy french fry. Not exactly. The tops of the leaves were tough and difficult to chew, if not near impossible. "Ok", I thought, not giving up hope, "the inside leaves will be better". They were better, but not great. In the end, I resorted to eating the leaves as if they were steamed, scraping the tender bottom part off and discarding the rest of the leaf. We agreed that it seemed like a waste and definitely not the intended result. PC110175.JPG The one saving grace of this dish was the artichoke heart. I guess that's why I couldn't be too upset. It was tender and a bit smoky tasting from the oil. It was definitely good eating, especially with a bit more salt. I'm sure my inexperience in making these was to blame for the flawed result. However, I bet they could be spectacular when done correctly, so please do not let that discourage you from trying this dish (just make sure to get baby artichokes). And, the best part of Hanukkah, there are 7 more nights to fry things and get them right.

Carciofi alla Giudia Reprinted from The Jew and the Carrot (http://www.jcarrot.org)

4 medium sized artichokes (look for vegetables with soft, long, flexible stems) 1 lemon Plenty of olive oil Sea salt to taste

Fill a large bowl with water and the juice of one lemon. Working one artichoke at a time, trim the stem to 1 1/2 – 2 inches. Using a vegetable peeler, remove the outer dark green layer of the stem, revealing the softer, lighter green center. Cut off the artichoke’s thorny top (horizontally) using a serrated knife and then carefully slice the artichoke in half, (vertically).

Remove the artichoke’s tough outer leaves until only the soft inner leaves remain. Using a small spoon, remove the hairy “choke” at the center of each artichoke half. (It may seem like you are wasting a lot of the plant –which is kind of true. Assuage your guilt by composting them!)

At this point, open your windows and turn on a fan!

Fry #1: Select a pot that is large enough to comfortably hold all of the artichoke halves. Place them in the pot, fill with oil until chokes are half covered. Then add water to cover. Bring pot to a simmer and cook, uncovered, about 15 minutes until they are cooked but not too soft. Remove with tongs and place on a platter.

Fry #2: Heat about one inch of oil in a cast iron pan (or other heavy pan). Using a pair of tongs, and lots of care, place the choke halves side down in the oil. Be really careful–hot oil splatters and hurts.

Fry for about 12 minutes, flipping the chokes halfway through, until brown and crispy on both sides. Turn off the heat and remove the fried chokes with tongs. Place onto paper towels to drain. Sprinkle with salt and serve warm.

Peanut-Sesame-Soba-Noodle-Salad

Cold sesame noodles are ubiquitous on Chinese take-out menus but I've never been a huge fan. The cold sticky sloppy mess of noodle just never appealed to me as much as other options. Then one day I was looking around for something to do with soba noodles (Japanese buckwheat noodles, if you're not familiar with them). They are one of my favorite healthy go-to staples in the pantry and what reminded me this would be a good submission for Fight Back Fridays. Soba are often served in noodle soups, or served cold with a dipping sauce. That is what gave me the idea for this dish. A noodle salad that I could whip up for work week lunches, as well as a light dinner that would be more substantial than a green salad. The items that you add in can be altered to suit your preferences or what's in your fridge that night.

A quick dressing of creamy peanut butter (all-natural of course), soy sauce, sesame oil, ginger, garlic and honey are blended together to make the dish. I think the peanut-sesame combo is the key here. Peanut-sauce is often too much peanut-butter flavor with nothing else. Here, when mixed with the soy sauce and enough heat (from red pepper flakes or sriracha) it is more balanced and, frankly more interesting than the one-note flavor it has on its own.

The only add-ins to this salad I strongly suggest be included are chopped scallions and cilantro, to keep with a South-Asian flair. These flavors just work together and brighten up the peanut-flavored sauce. The rest is up to you. Make a batch of this to have on hand during a hectic week of pre-Thanksgiving cooking madness. As long as the dressing is made, you only have to take the 3 minutes to boil the soba noodles to pull it all together. Save yourself from greasy take-out in the weeks leading up to Thanksgiving. Or, take this for lunch the week after, because there are only so many leftover turkey sandwiches that any person should have to endure.

Peanut Sesame Soba Noodle Salad Adapted from Recipezaar. Do not dress the noodles too far in advance or they may get a bit soggy. For the dressing: 1/2 cup smooth all-natural peanut butter 1/4 cup soy sauce 1/3 cup warm water 2 tablespoons peeled fresh ginger, chopped 1-2 teaspoons fresh minced garlic 2 tablespoons rice wine vinegar 1 1/2 tablespoons sesame oil 3 teaspoons honey 1/2 teaspoon crushed chili pepper flakes or sriracha

For the salad: 1/2 package soba noodles, cooked and rinsed under cold water 3 scallions, chopped (green and white parts) 1 red bell pepper, seeded and cut into thick strips 1/2 cucumber, seeded and chopped 1 large handful of cilantro

Using a blender puree all the dressing ingredients until smooth (about 2 minutes). Alternatively, whisk all ingredients until they appear well combined.

Cook the soba in a large pot of boiling salted water until tender about 2-3 minutes; drain and rinse well under cold water to stop the cooking. Transfer to a large bowl, then add in the remaining salad ingredients.

Just before serving pour the dressing over the cooked pasta and veggies. Toss well to combine.

Zucchini linguine martini bikini Fritters

P7310198.JPGI made zucchini fritters the other night. A fine thing to make to use up some of the mid-summer abundance of squash. While I was standing there with my box grater, grating up zucchini I kept hearing Vince, this hysterically energetic infomercial guy who sells some chopping kitchen gadget. At one point in this particular commercial while he's demonstrating all the things you can grate, he says things like, "fettuccine, linguine, martini, bikini". Hey, what about zucchini, that rhymes too! (This guy has a ton of ridiculous lines one of my favorites being, "stop having a boring tuna, stop having a boring life" that I can't seem to get out of my head, probably cause his commercial is on once a morning while I'm trying to watch for the weather.) Anyways, if you haven't seen Vince in action, it's kind of funny in that infomercial way. Watch it here (localappetite does not endorse the use of this product, only the use of this kind of enthusiasm for cooking). P7300187.JPG In case you hadn't guessed by now, I've been on a one-dish kick this summer. It's insanely hot in my kitchen and basically when I have the time to cook, I'm not making entire meals. Something fresh and tasty that utilizes my CSA produce is basically the only thing that has been motivating me this summer. I've just been rounding out the meals with more cheeses, eggs, dips and fruit. It has been a good way to handle eating at home without being in the kitchen for too too long. I was a little hesitant to fry for these fritters. But, Nigel Slater's entry on the same in The Kitchen Diaries had been in the back of my mind for some time. The only essential step to this process is the time to allow the zucchini to sufficiently drain (see photo above) otherwise you'll end up with soggy fritters that will fall apart when you try to cook them.

The one surprising thing about this recipe was that it added an extra step, which although I followed, I think I would recommend you omit it. Instead of simply mixing the grated drained zucchini in a bowl with your binders, egg and flour, and then frying, he writes that you should saute it all in a pan first and then add the flour and egg and then make little balls and fry in a second pan. I thought he might be onto something (maybe it added extra flavor or helped to further dry out the squash?), but after cooking the recipe through, I think it was an unnecessary step, leaving you with an extra pan to clean. I wouldn't want to do that to you. Either way you do it, you'll end up with light and moist zucchini fritters, if you don't flatten them too much into more of a pancake shape. As you know zucchini works well with almost anything, but either feta or Parmesan would be interesting. I used dill for the seasoning, but definitely just go with what you like or have on hand. And just like zucchini itself, this dish is versatile and will go with whatever else was on the menu for that night. Or, if you're like me, it's ok to just eat this and save room for dessert. It's too hot to eat a big meal anyways, right? P7300193.JPG

Zucchini Fritters Adapted from The Kitchen Diaries, by Nigel Slater

3-4 zucchini, grated Salt 1 small onion, chopped 1 clove of garlic, minced 1/2 cup grated cheese, your choice 1 handful of fresh dill, chopped 1 egg, lightly beaten 2-3 tablespoons all-purpose flour Olive oil

Coarsely grate zucchini and place in a colander. Salt liberally and allow to drain for about 30 minutes. When ready to use take handfuls of it and squeeze out any additional water before placing it in a bowl.

Mix drained zucchini with the rest of the ingredients. It will be a slightly stiff mixture. Heat a heavy pan with enough olive oil for frying. Drop mounded tablespoons into the pan and allow to brown. Keep your eye on them as the oil gets hotter (they will cook very quick at the end) and take care when flipping the fritters as they fall apart easily (a spatula and a fork together worked best for me).

Deconstructed Elote aka My New Favorite Summer Salad


Elote is the Mexican name for grilled corn on the cob smothered with crumbly cheese, lime juice and a bit of cayenne pepper. It is a specialty in the Yucatan peninsula and lucky for me available in various restaurants and flea markets around Brooklyn, if you know where to look. However, if you haven't had one of these, please stop reading and go find one. It truly is one of the best street foods I can think of. It transforms a cob of corn into an explosion of flavor. I would make this treat for myself on a regular basis if I had access to a grill, but since I don't (sob, sob) I used to just wait until I went out for Mexican food to have it. That all changed last night. I think I'll probably make this little beauty of a salad at least once a week, or as long as I have access to the fresh ingredients. My corn on the cob actually came from my CSA. Now if we could only grow avocados up there...
On the issue of eating locally, I have been thinking a lot about how cooking different cuisines can work with a sustainable cooking philosophy. There are always going to be certain essential ingredients that are not going to be available locally if you're preparing dishes from regions and countries with a different climate. In summer I tend to cook a lot of Mexican or Mediterranean dishes, and things like citrus, or olives, or certain cheeses aren't locally sourced in the Northeast where I'm located (as far as I know). It's in these situations I think there is room for flexibility. The goal is to support sustainable food and food purveyors by voting with your fork, but it is not to suffer in the process. I think eating local is the right thing to do, and if everyone did it there would be a change in our broken food system. But, I also think allowing yourself to purchase things that are unavailable in your region is alright too. Phew. Glad I got that off my chest.

Back to the dish. I got the idea for this salad after reading Mark Bittman's article last week in the NY Times Dining section. It was another one of his mega-lists of quick and genius flavor combinations. If you missed it, go and read it here. I know I'm going to use this list again and again when I'm having a cooking block. It's no coincidence that I picked his idea for deconstructing elote for a corn salad as my first dish. It is perfect for a picnic, or when you don't have access to a grill. Or for someone who just wants to eat with a fork.

Basically, you take the corn off the cob and quick roast it until it gets a bit brown in a skillet. This will cause a wonderful toasted corn smell to infuse your kitchen. Combine that with the essential components of elote, fresh lime juice, creamy queso fresco, and some heat (either cayenne pepper or chilis) and you have elote in a bowl. I added a few ingredients to plump up the salad, which just made it a bit more into a meal. Once done, take your salad and a cold cerveza onto your fire escape and you can almost pretend you are sitting in a plaza in Mexico as the sun sets. Buen provecho!

Deconstructed Elote Salad
I mixed the leftovers with some cooked shrimp for lunch today. Options are endless.

3 ears of corn
queso fresco (to taste)
fresh lime juice (about 1 big lime or 2 small ones)
1 jalepeño, deseeded and minced
cherry tomatoes (about 1/2 cup)
1 scallion, chopped
cilantro (small handful)

Take corn off the cob with a sharp knife. Place in a pan with some olive oil and cook stirring to avoid it sticking, till the kernels have a toasted look to them. Place in a
bowl and mix with the cheese and lime juice. Chop all the other ingredients
you're using and mix together. Easy Peasy.

A Simple Red Pickle

I really like pickled things. There are some vegetables I like even better pickled than raw, such as red onions. Lucky for me making pickled red onions is a snap. They will keep in the fridge for a few weeks (or more) to help add something extra to a sandwich, a salad, or whatever needs jazzing up. I have not ventured into the world of canning, yet, but these types of pickles do not need preserving that way. You can pretty much quick pickle almost anything, but red onions are the ones I think everyone should try. Yes, I know it's been done before. And, yes I know this isn't going to be an amazing culinary creation that will make you a bit hungrier as you read this. But, I can tell you that having this jar at your disposal, really does brighten up an otherwise dull dish. It's a condiment in the spirit of Fight Back Fridays as it is definitely better for you than any store bought, corn syrup loaded, preservative-laden, condiment you can purchase.

These red onions are tangy, and sweet. They have the satisfying pickle crunch that people love. They're acidic, and depending on your pickling spice of choice, possibly spicy. And, they're EASY!! Before I made these quick pickles I never would have guessed, how easy. Take a red onion, or two, or three. Get out your sharpest knife, or a mandoline if you have one. Slice the onions as thin as you can get them. P7210116 Next, you have to prepare the pickling liquid. There are probably a million variations of spice and flavoring for this kind of thing. One constant is the acid. Either apple cider vinegar, or red wine vinegar, or even rice wine vinegar if you were doing an Asian-inspired pickle. This time I was going with a recipe I found in my awesome Greek cookbook, The Olive and the Caper, by Susanna Hoffman, so I used the red wine vinegar. Put one part vinegar to one part water into a pan with a couple of tablespoons of sugar. I used raw cane sugar, but I have tried brown sugar in the past, which was very sweet and delicious too. I threw in a bay leaf for flavor. You can throw in some peppercorns, or other whole spices of your choice. Bring the vinegar-water-spice mixture to a boil. P7210126 Once the sugar has dissolved, it's ready. Pour over the onions to let them marinate before refrigerating. P7210132 After about 45 minutes, you can use them right away. The flavor will get better over time though. So, pour the rest into a jar with a lid, and store in your fridge to use over, and over again.