Muffins that adapt to the seasons
 Happy Spring everyone! The weather is practically perfect and it seems everyone is outside taking in the sunshine. Which, is why you should get out of the house, away from the stove, and enjoy the weather. Time to start thinking about spring vegetables and before you know it, summer fruit. That's why I thought about these muffins. They're a basic muffin recipe flavored with fruit, and nuts if you want, which adapts to the season and what fruit is available in the market that day. They're an easy, effortless way to do a little home-cooking quickly, and produce a perfect little portable breakfast treat to take to the park, where you can sit in the sunshine with your dog, your friends, a newspaper, or all of the above.
 Muffins and me have had some ups and downs. When I was younger, blueberry muffins from a mix in a red box might have been one of the first things I ever baked. When I went to college, the store across the corner from where I had my classes sold muffins that were about one pound each. They were massive, and I ate one almost every time I had a morning class. Mostly sticking to the chocolate-chocolate-chip variety. By junior year, I realized that I was basically eating a large piece of cake for breakfast every morning and they weren't that exciting anymore. After a brief switch to brain muffins, I just quit on them entirely. I never touched one again for years. I decided they were unhealthy and boring. When I started cooking at home more, I gave them a try again since I had all these muffin tins, but I was a bit too preoccupied with the francophile infatuation I was suffering from post-college, and all I wanted to eat was flaky croissants in the morning (I wasn't concerned with the health factor of those cause we all know French girls are skinny).
These days, my tastes have come full-circle and I'm back to loving muffins. They serve as a great vehicle for jam and once they're a day-old they're even better toasted with some butter. The recipe I use is adapted from one I found in a magazine's cooking with kids section, so you really can do this. The addition of a bit of plain yogurt is what I think makes these much more moist and tender then other muffins. As more and more fruit comes into season, and some of it gets lost in your kitchen and gets a bit past it's prime, muffins are where you can use up over-ripe fruit. But, in all honesty, I must warn you, muffins are the baking gateway drug. Make them and you'll suddenly realize that baking is fun, you want to do more of it, and harder recipes will suddenly seem reasonable to try.
Fruit (and nut) Muffins Adapted from Delicious Magazine. Makes about 7 large muffins or 14 mini-muffins, or the recipe can be easily halved if it's just for you. Below are some seasonal fruit flavor ideas.
Basic Plain Muffin 1 1/3 cup all-purpose flour 3 1/2 teaspoons baking powder (original recipe used self-rising flour) 1/2 teaspoon salt 1/2 cup sugar 2 large eggs 1/2 cup yogurt (I used Fage brand, full-fat or low-fat is ok) 1/2 whole milk 1/4 teaspoon vanilla 1/4 cup (or a little less) cooking oil (any kind but olive)
Preheat oven to 350 degrees Fahrenheit. Grease whatever muffin tins you'll be using with butter. Sift dry ingredients (flour-sugar) into a large bowl using a mesh strainer.
Crack the eggs into a bowl and beat with a fork. Measure all your wet ingredients (yogurt - vanilla) and mix together with the eggs. Pour the egg mixture into the bowl with the flour mixture. Gently fold together until flour is incorporated.
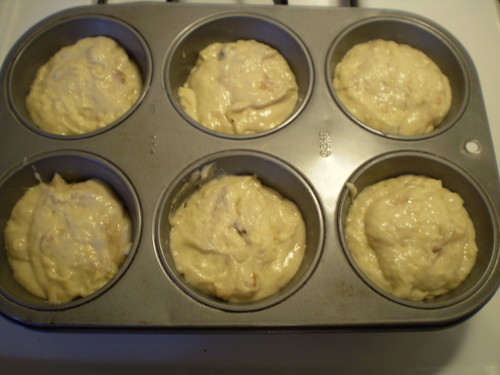
At this point add whatever fruit and nut mixtures you want to flavor the muffins (see ideas below) into the batter and mix together. Spoon the batter into the muffin tins until each muffin is about 2/3 full.
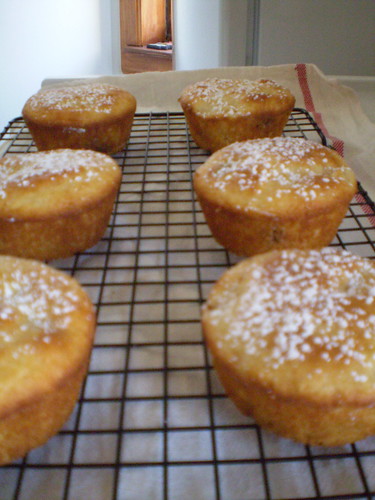
Bake for 25 minutes or until they are puffy and golden brown. Cool in the tin for about 5-10 minutes and then flip out of the pan to cool on a rack the rest of the way.
Fruit add-in ideas Spring: Apricots (ripe), chopped + pecans, chopped Juice and zest from one Orange + 1 mashed banana + handful of hazelnuts chopped
Winter: 2 Pears peeled and cored and chopped +zest of lemon and juice 1/2 of it + handful of raisins
Summer: Options are endless...but blueberries are a classic.


